To open the app, click the App Launcher and search and click SMS Ninja App.
1. SMS Provider Configuration
Before messaging can occur, at least one SMS provider must be added to send and receive messages. Steps to configure the SMS provider:
- Click the SMS Settings tab.
- In the left menu, click SMS Provider Settings.
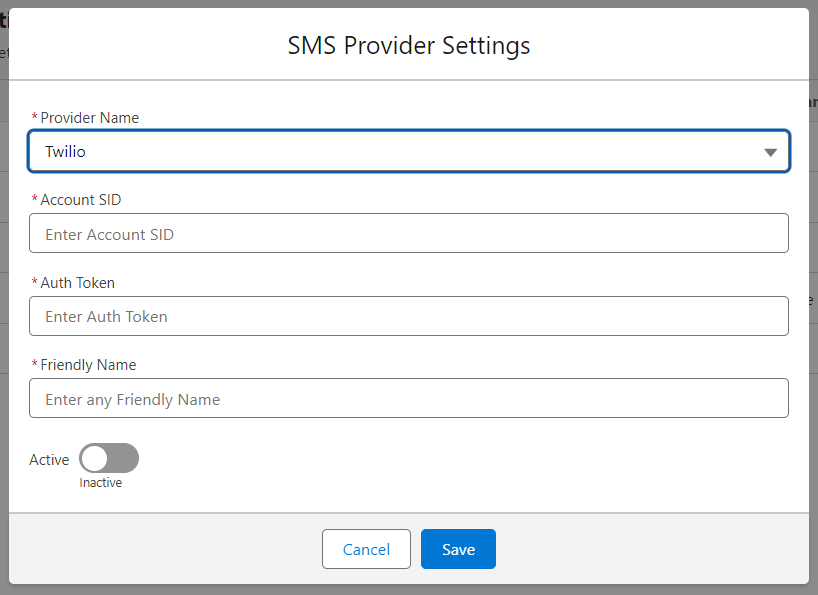
- Click the New button to create a new SMS provider.
- From the dropdown menu, select your desired provider.
- Fill in the required fields:
- Account SID: Unique account service ID from your Twilio account.
- Auth Token: Token generated from your Twilio account.
- Friendly Name: A name for identification.
- Active: Enable the toggle to activate the provider.
- Click Save to store the SMS provider.
2. Object Mapping Configuration
To ensure smooth operation with custom and standard objects, object mapping is essential for defining the name and phone fields. Steps for Object Mapping Configuration:
- Click the SMS Settings tab and then the Object Mapping tab.
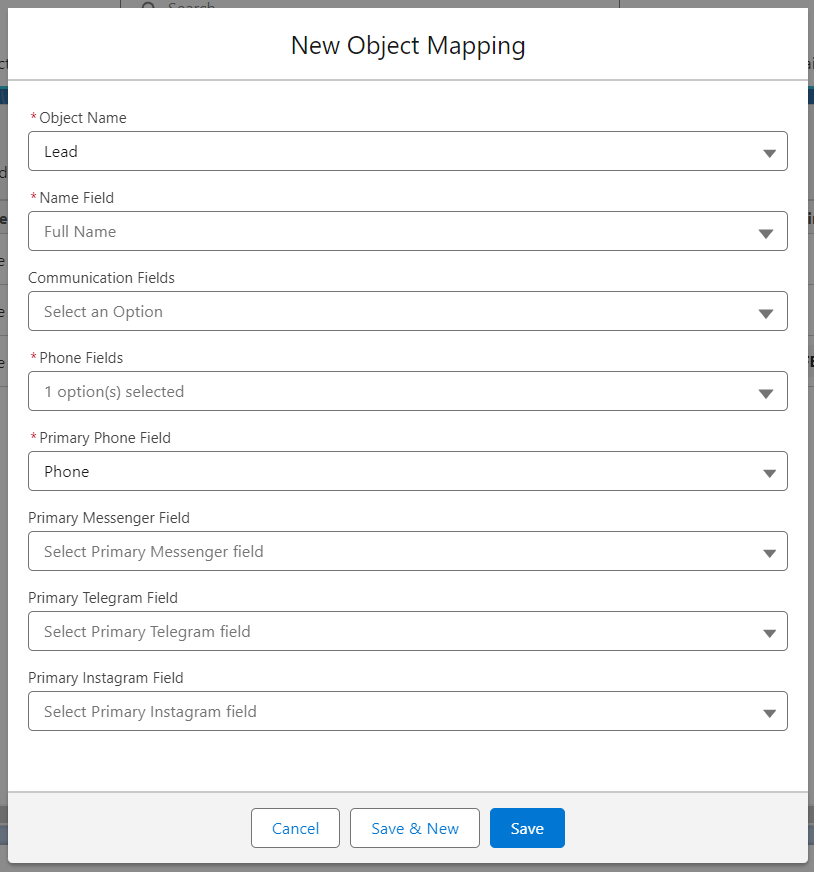
- Click the New button.
- Fill in the following fields:
- Object Name: Select the object name for mapping.
- Name Field: Choose the field that displays the record’s name (recipient).
- Phone Field: Specify the field used for the customer's phone number.
- Primary Phone Field: Identify the default "To" number field.
- Click Save to complete the mapping.
Communication fields are optional but can be beneficial for messaging through, Messenger, and Telegram.
3. Phone Number Configuration
To send messages to customers, you must configure phone numbers in the SMS Ninja app. Steps to configure phone numbers:
- Open the SMS Settings tab and go to the Phone Numbers subtab.
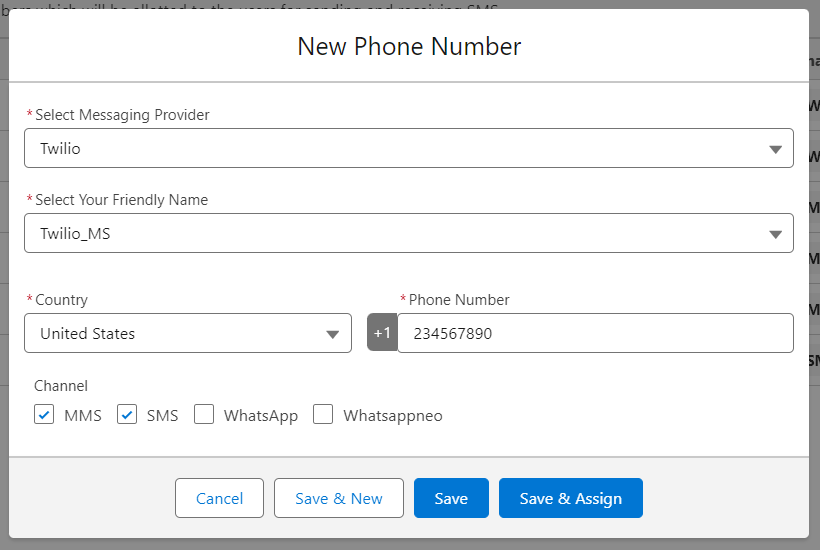
- Click the New button.
- Fill in the following details:
- Messaging Provider: Select the provider for the phone number.
- Friendly Name: Choose a specific friendly name.
- Country: Select the country for the phone number.
- Phone Number: Enter the phone number without special characters or spaces.
- Channel: Check the relevant channel checkboxes.
- To assign the phone number to users, click Save and Assign, select users, and click the right arrow to add them.
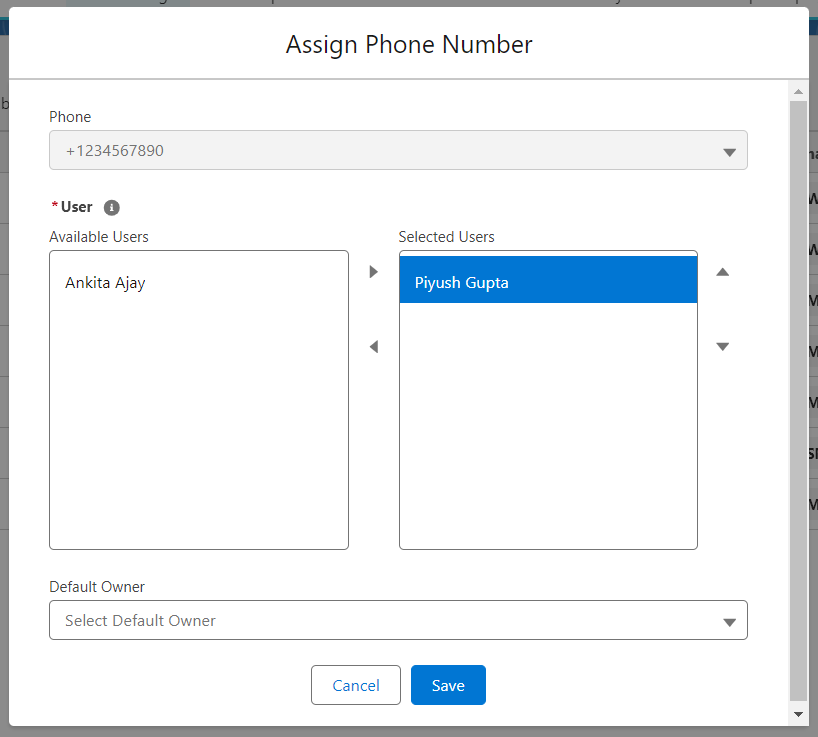
- Set a default owner for the phone number to receive notifications for incoming messages.
- Click Save to finalize the assignment.
4. Phone Number Assignment Configuration
If a phone number is not assigned to any user at creation, you can assign it in the User Phone Number Mapping section. Steps for phone number assignment:
- Click the New button in the top right corner.
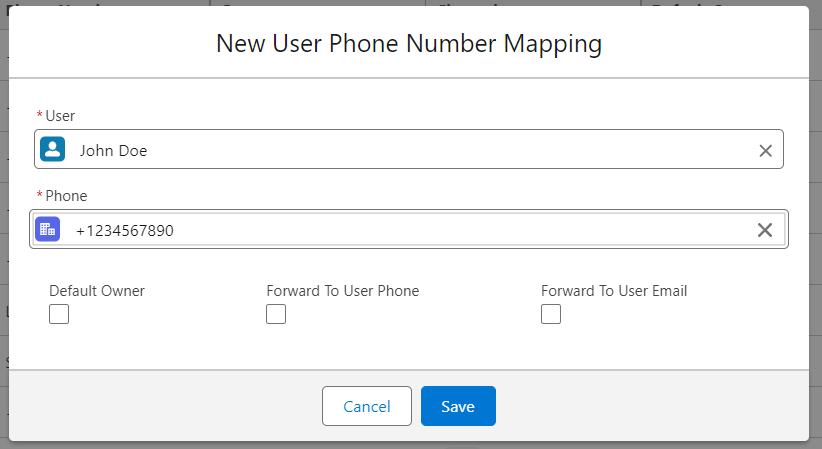
- Fill in the fields:
- Users: Select the user for assignment.
- Phone: Enter and select the phone number.
- Default Owner: Check if this user should be the default owner.
- Forward To User Phone: Enable forwarding incoming SMS to the user's phone number.
- Forward To User Email: Enable forwarding incoming messages to the user's email.
- Click Save to complete the assignment.
5. Keyword Settings Configuration
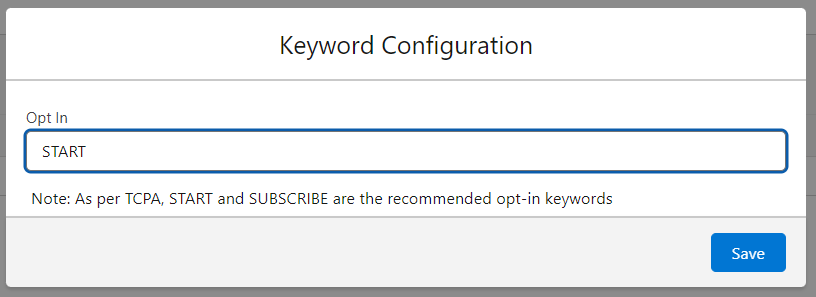
To comply with TCPA regulations, set up keywords for Opt-in and Opt-out messages. Steps for Keyword Configuration:
- Go to the SMS Settings tab and open the Keyword Configuration subtab.
- Enter Opt-In Keywords (recommended: “START” or “SUBSCRIBE”) and click Add.
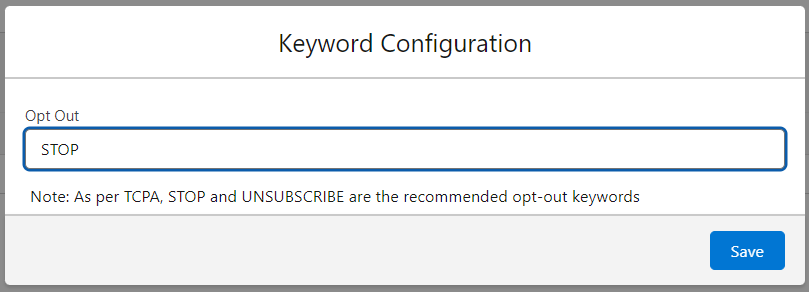
- Enter Opt-Out Keywords (recommended: “STOP” or “UNSUBSCRIBE”) and click Add.
6. Email Service Setup
Automate email processing using Apex classes for inbound emails. Steps to set up Email service:
- Log into your Salesforce org and go to Setup.
- Search for Email Services.
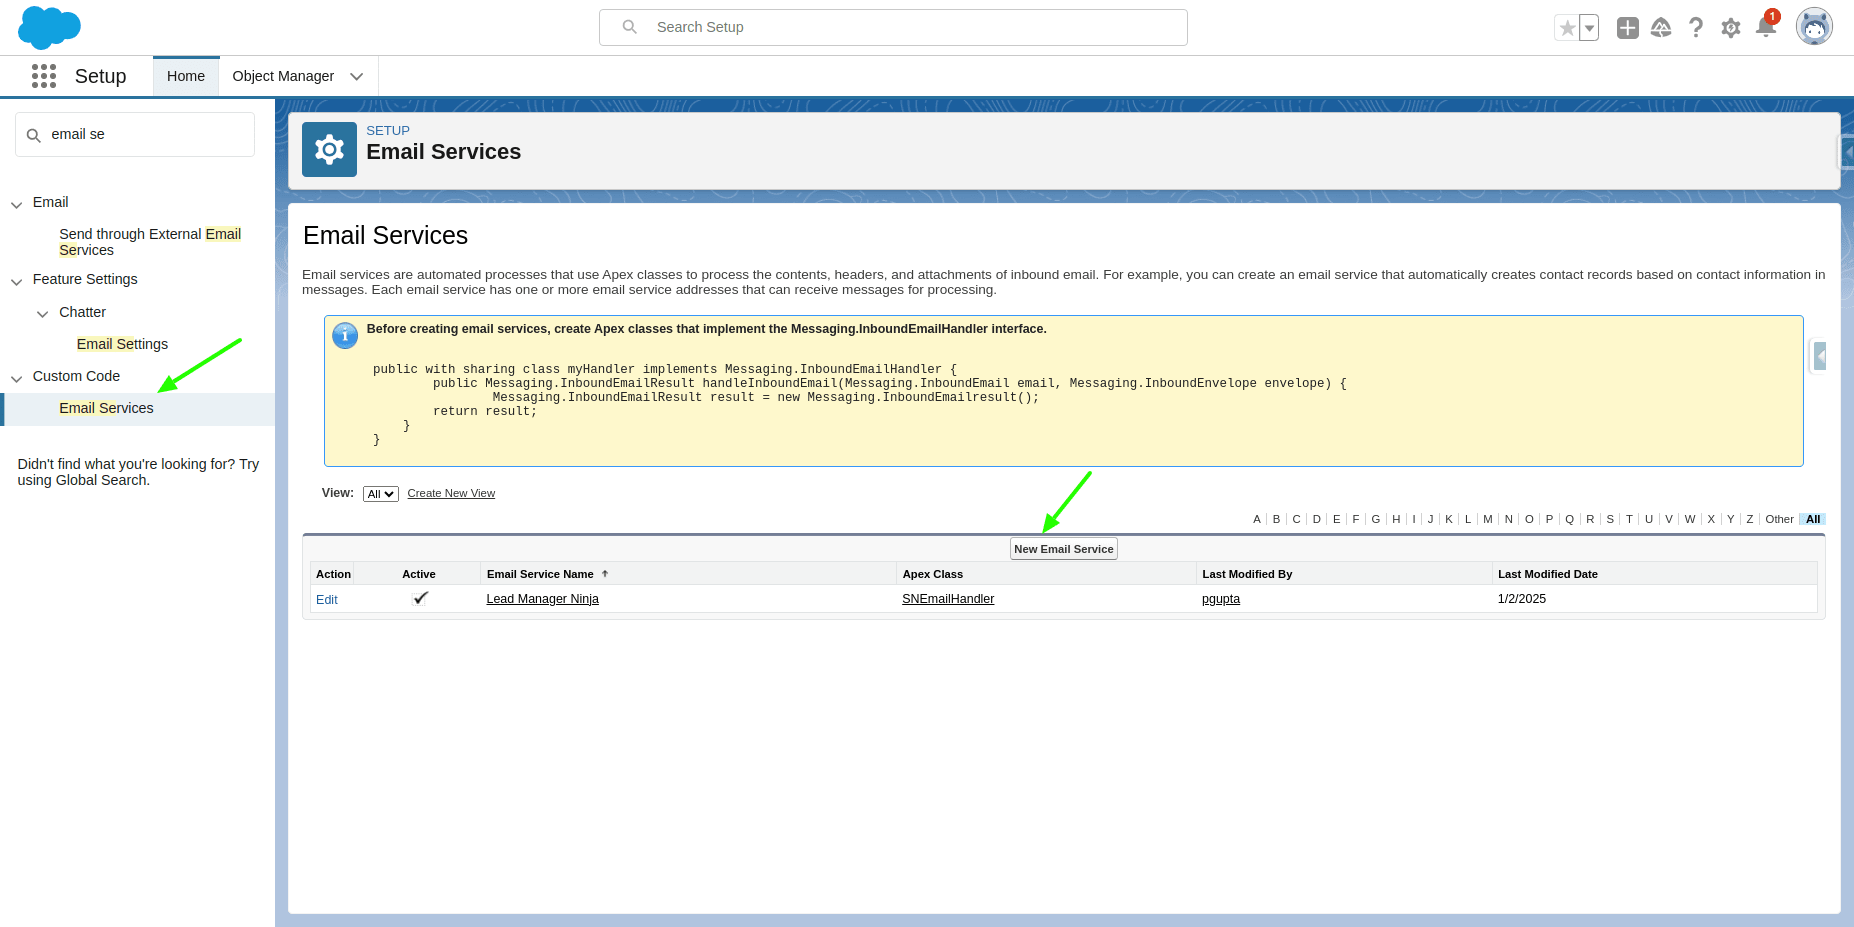
- Click New Email Service.
- Name the email service and select SNEmailHandler as the Apex class.
- Set Accept Attachments to “All” if needed.
- Check Active and click Save and New Email Address.
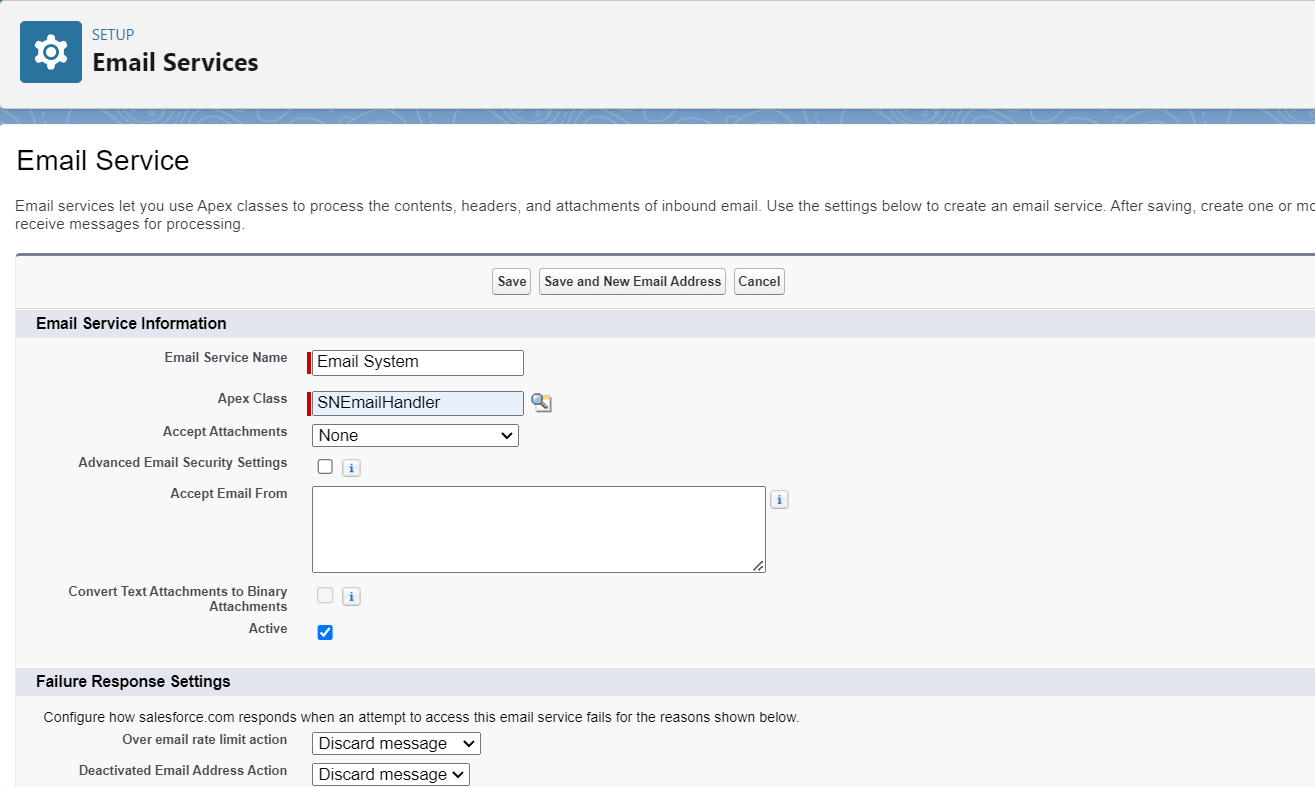
- Enter the email address name and a simple email address.
- Activate the service, select the context (admin) user, and leave Accept Email From empty.[e]
- Save the settings.
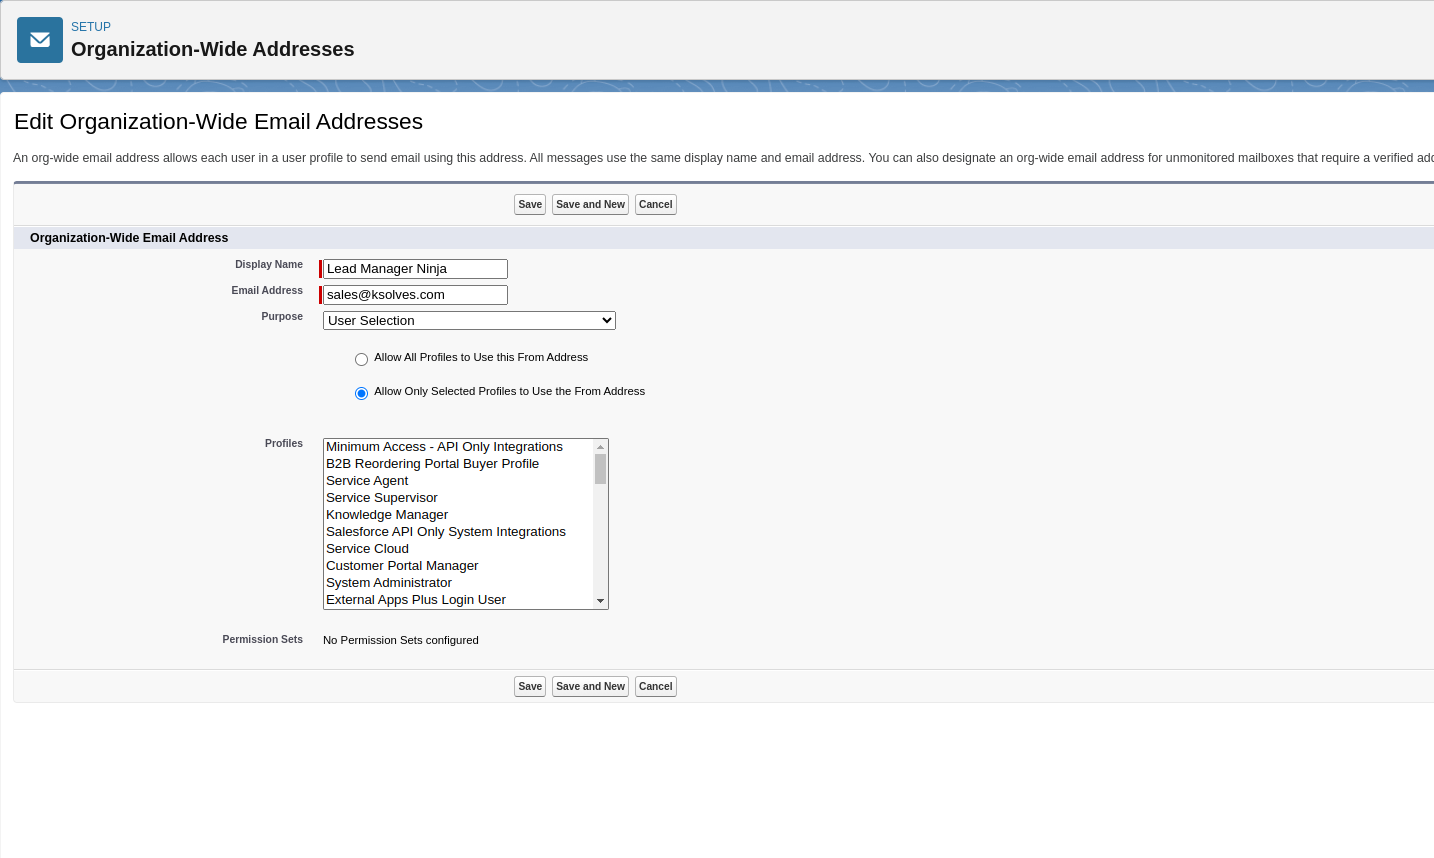
- Verify your mail to the ‘Organization-wide Email Addresses’.
Org-wide email addresses in Salesforce are email addresses that will be used by the Salesforce org to send emails from within Salesforce.
- Again, go to Setup → Quick Find → Search Organization-wide Email Addresses.
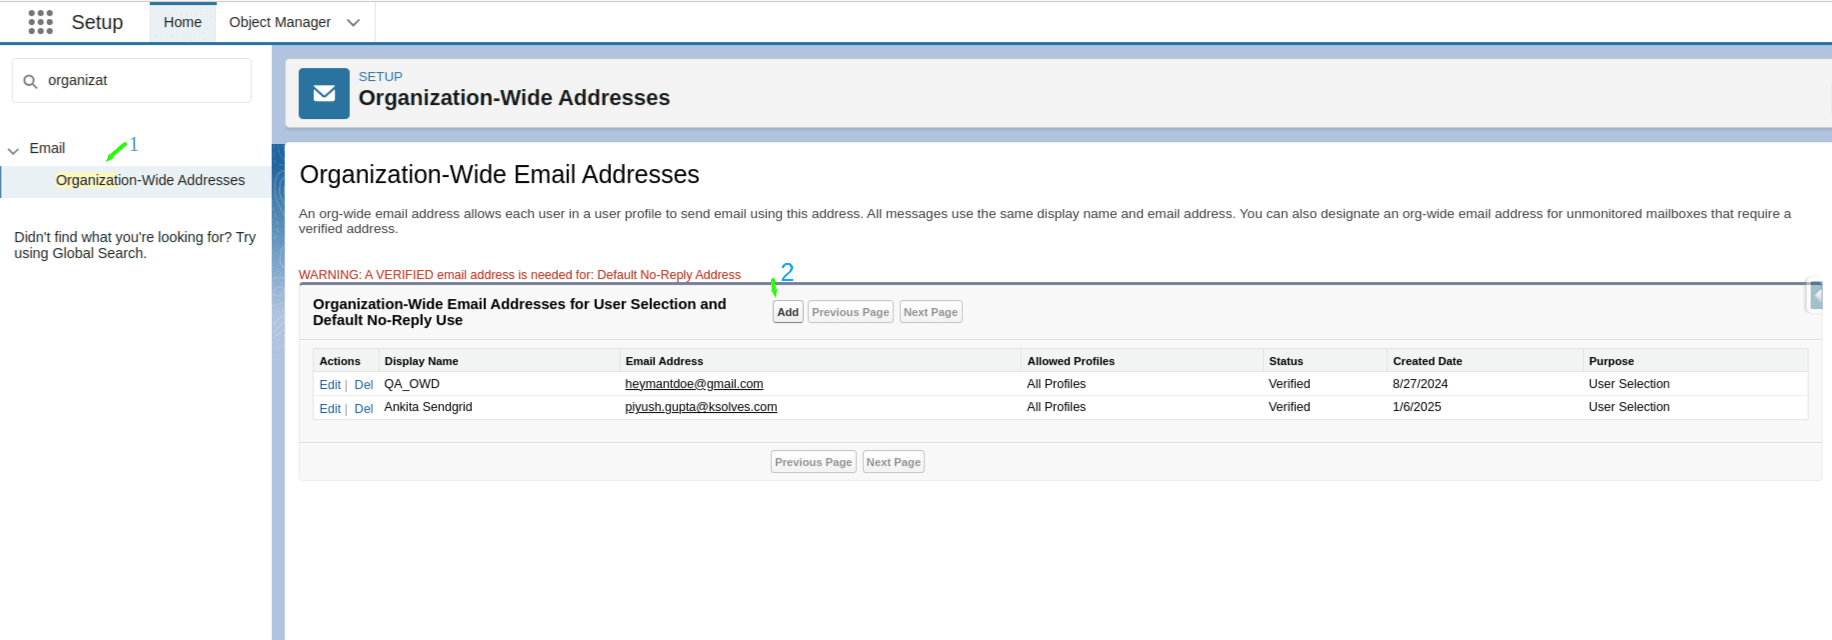
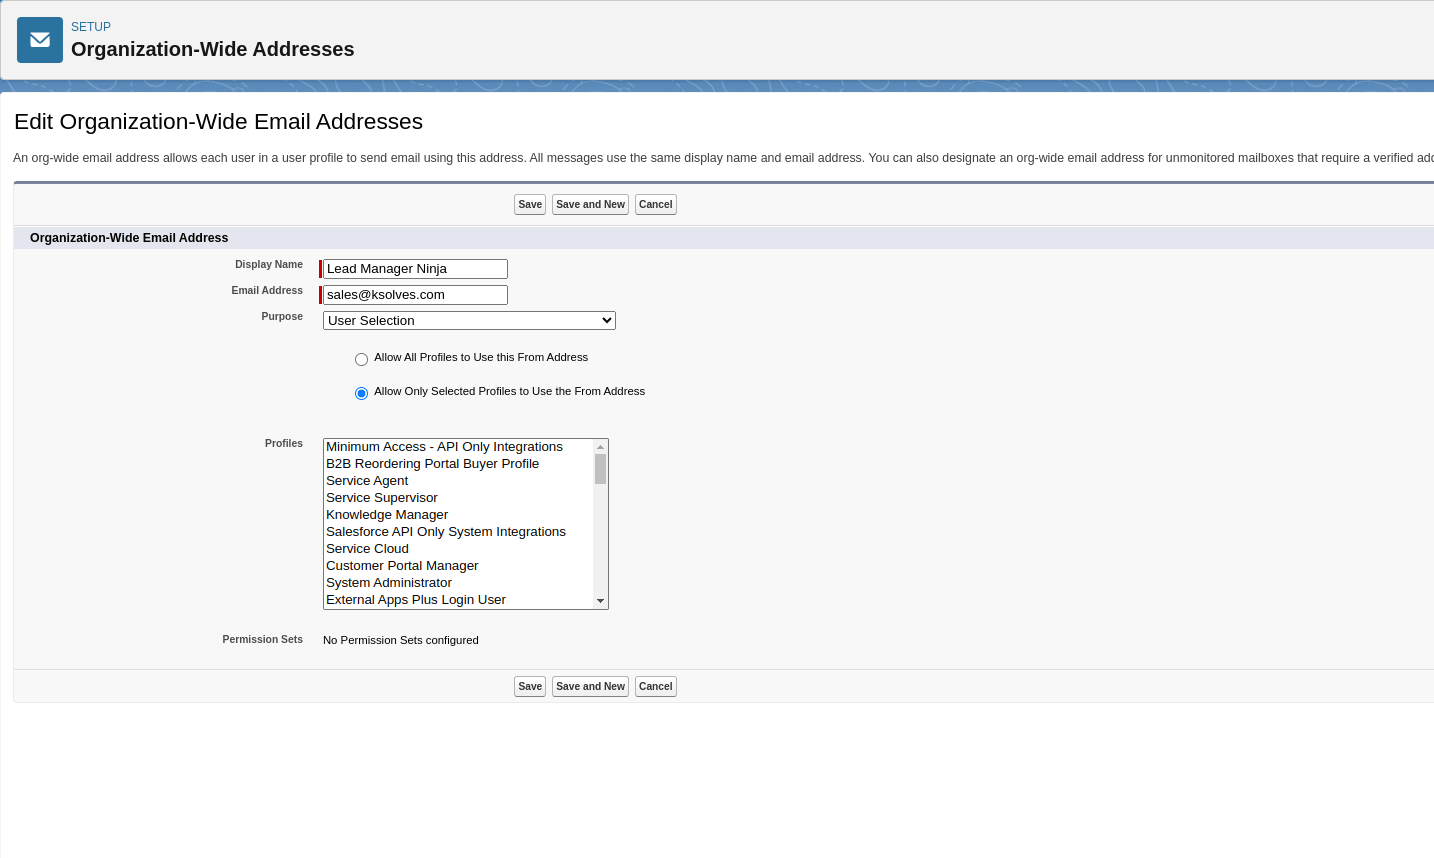
- Click on Add and Fill the Display Name → Fill Email Address → Fill Purpose like below.
- Select the Profiles as the requirement.
- Save.
- Verify it in your mail.
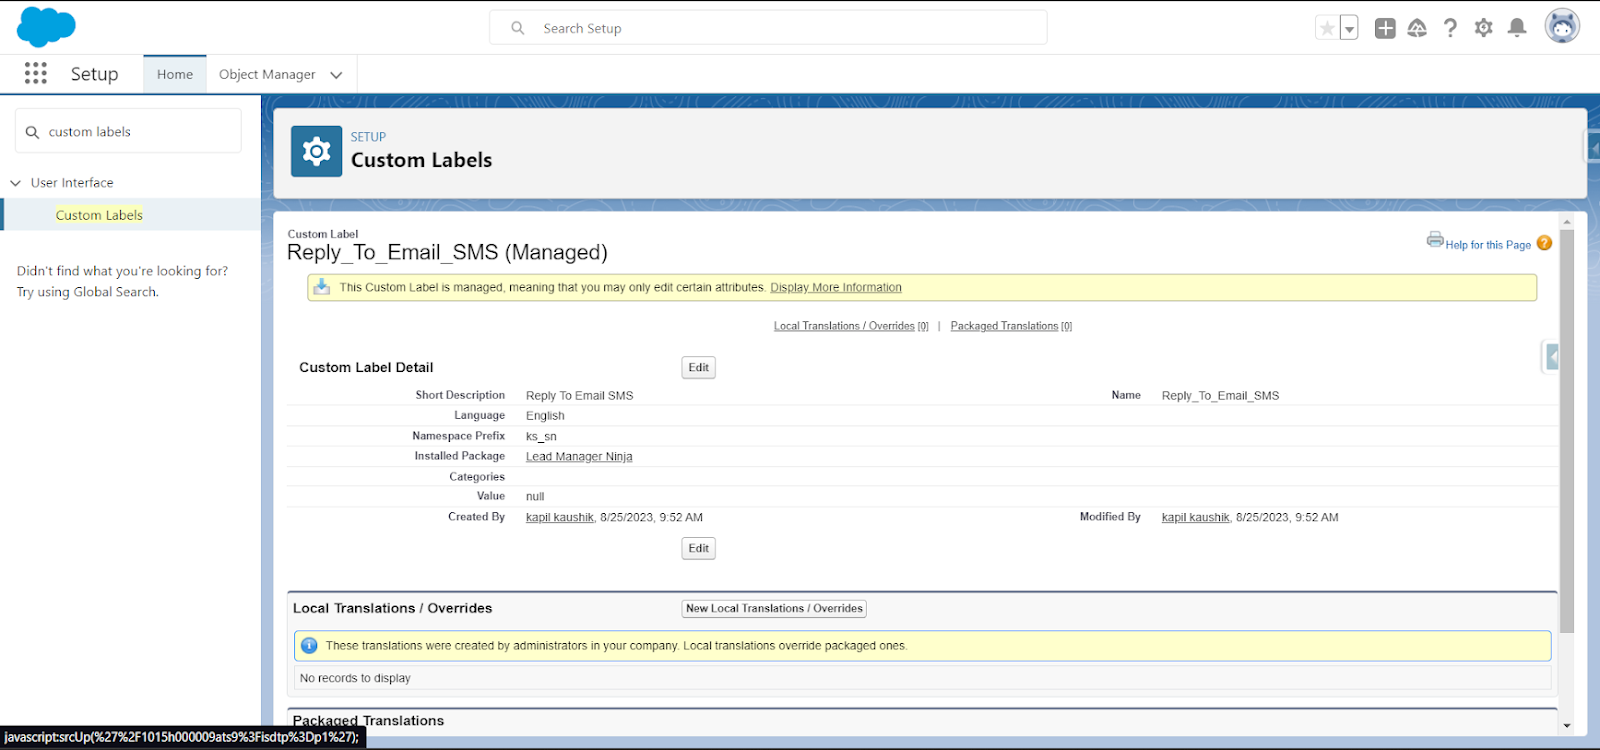
- In the Quick Find search on the left enter Custom Label.
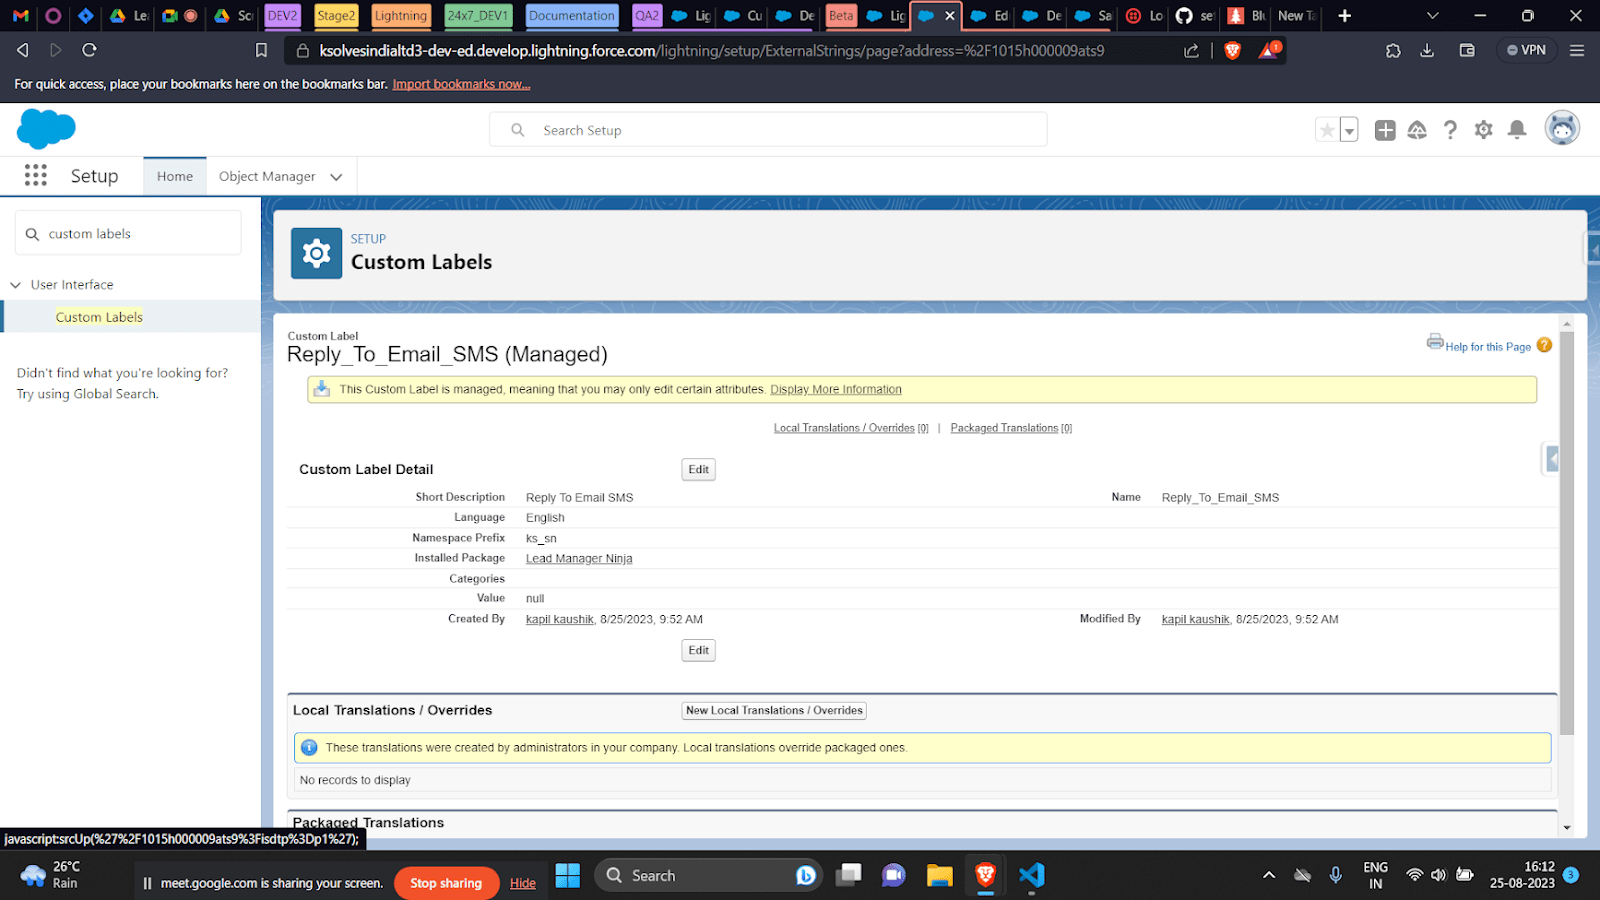
- Click Custom Label.
- In the Quick Find search on the left enter Custom Label.
- Go to Reply_To_Email_SMS (“Edit”).
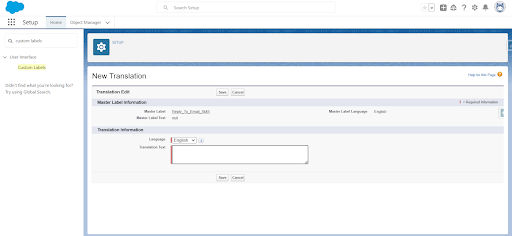
- Click on the New Local Translations / Overrides button
- Select the Language “English” and Enter the Email service in the Translation Text box.
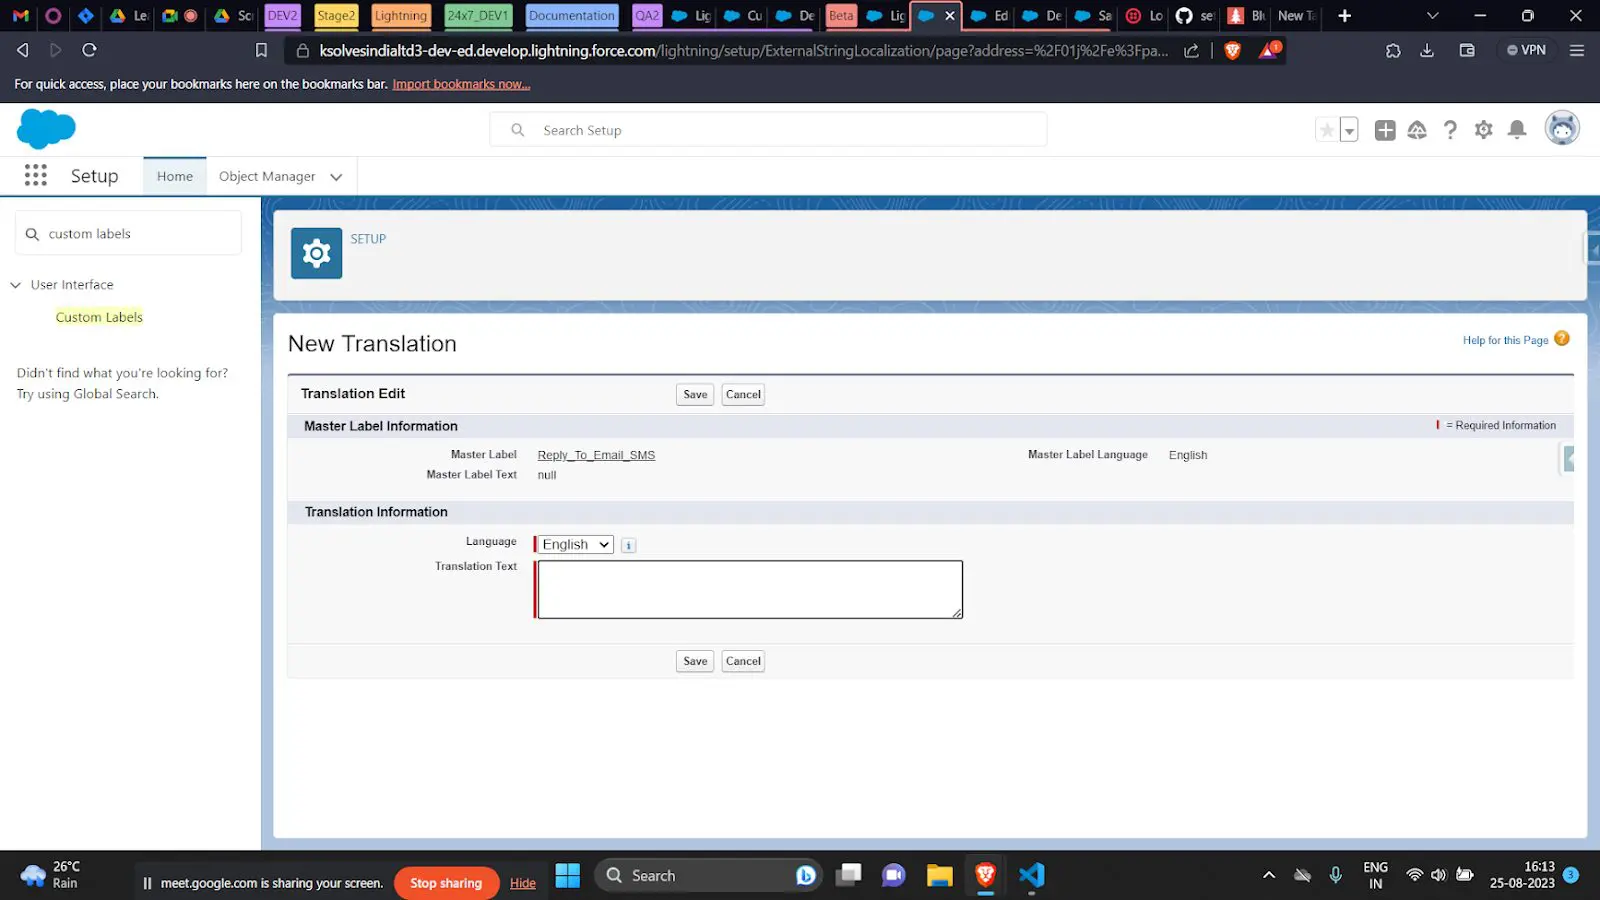
- Save.
7. User Email Mapping
Assign verified organization-wide email addresses to users. Steps for user Email mapping:
- Search for User Email Mapping in the App Launcher.
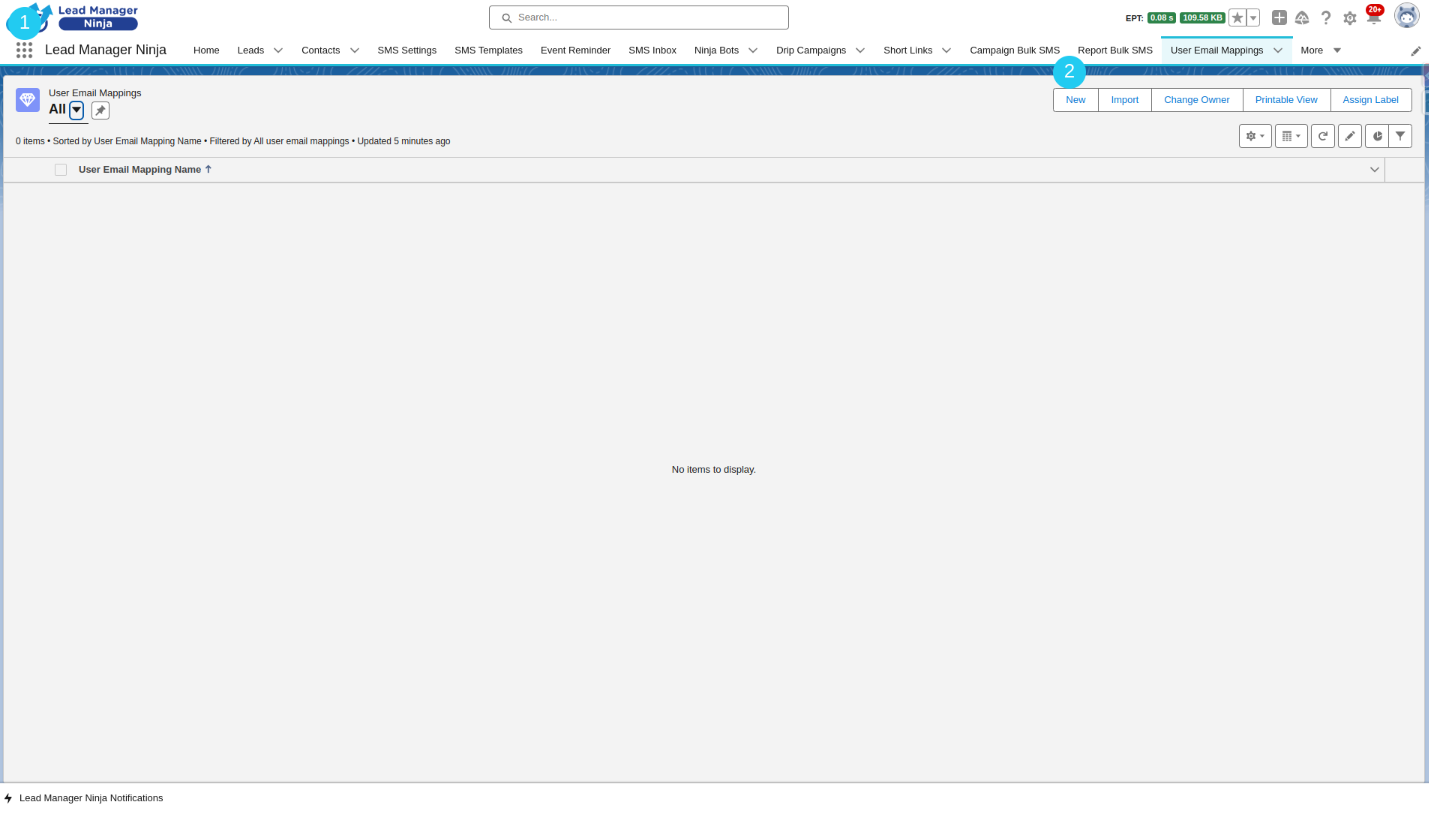
- Click New and fill in:
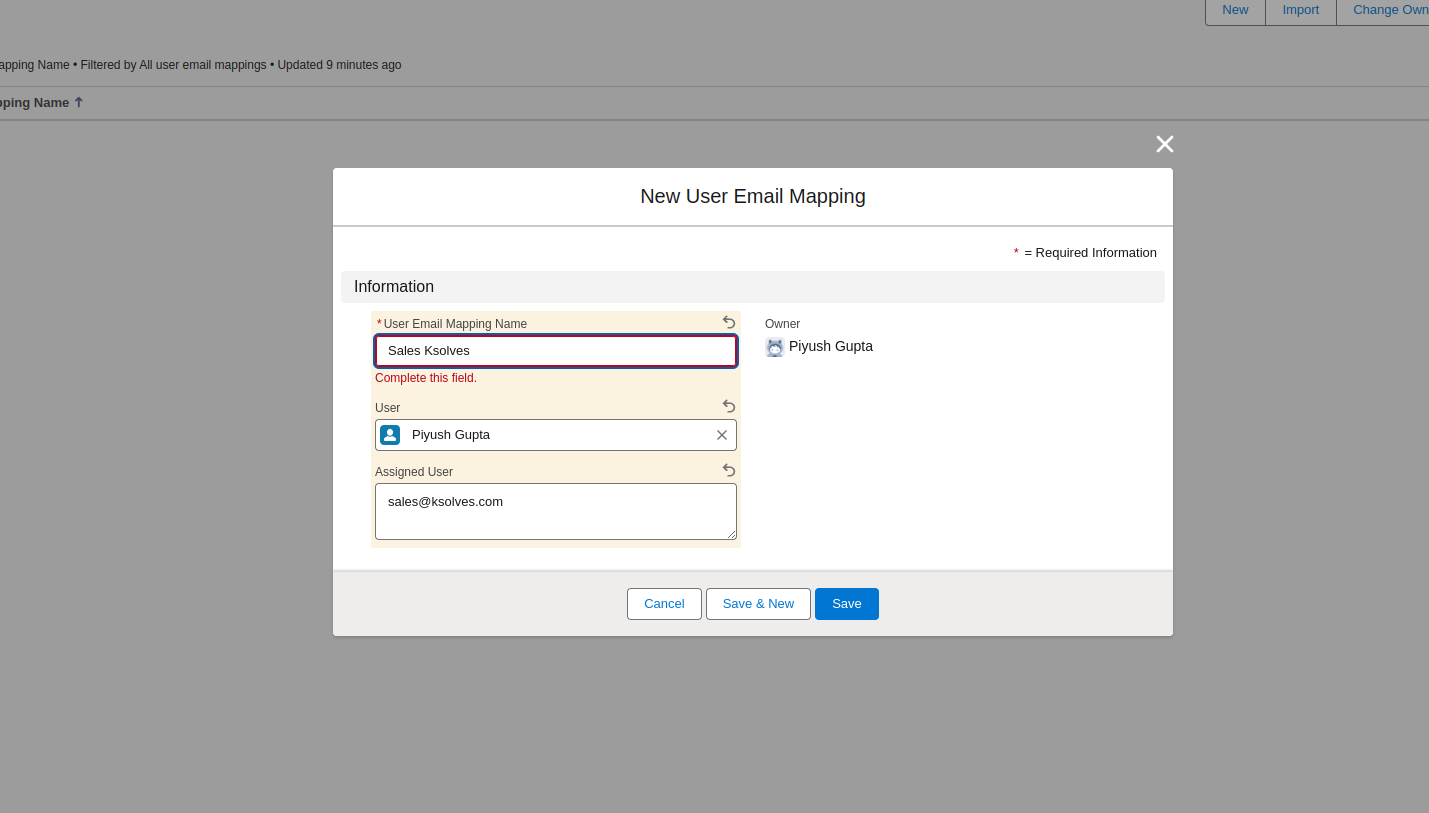
- User Email Mapping Name.
- Select the user who will send emails.
- Enter the verified org-wide email address.
- Click Save to complete the mapping.
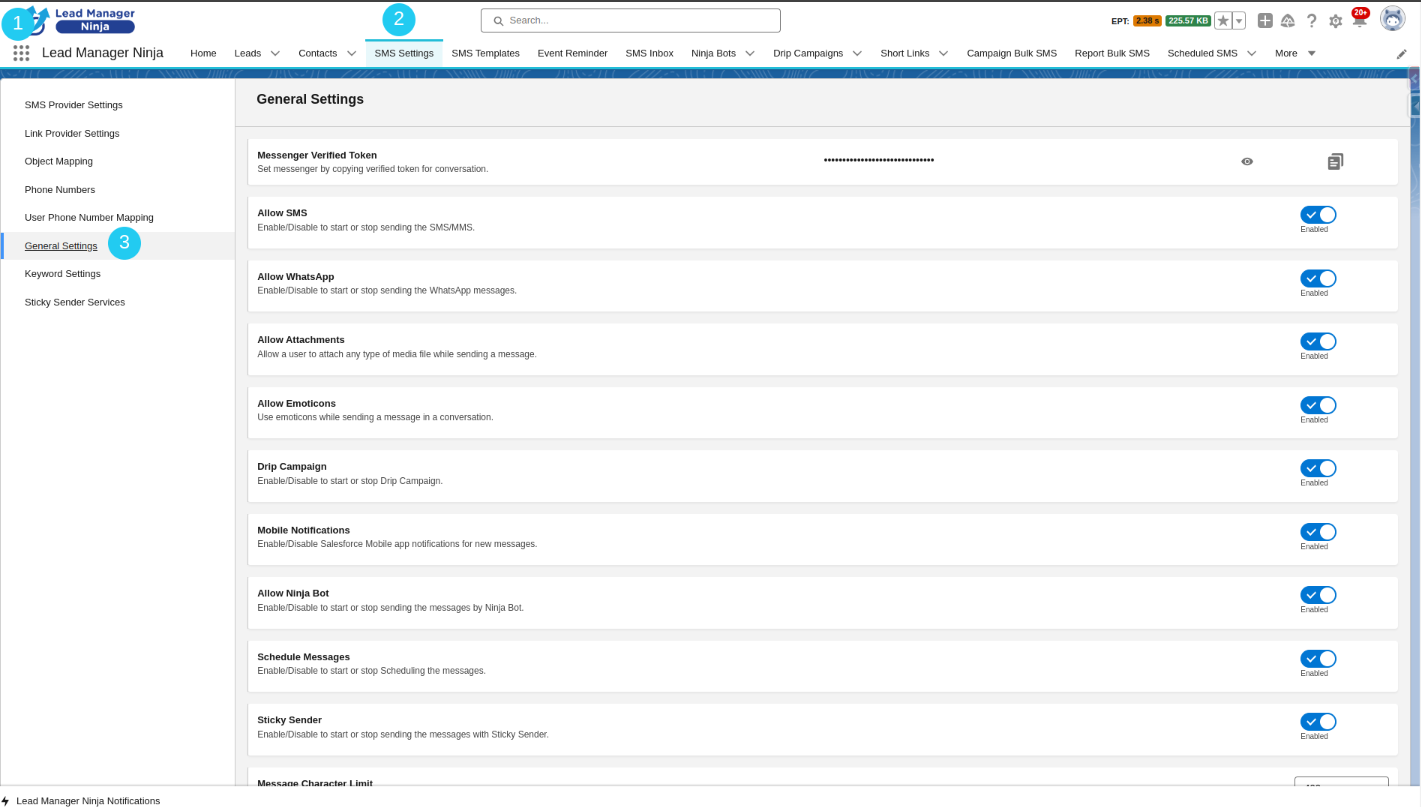
8. General Settings
You can customize certain features in the SMS Ninja app through the General Settings. Steps to adjust general settings:
- Click the General Settings subtab.
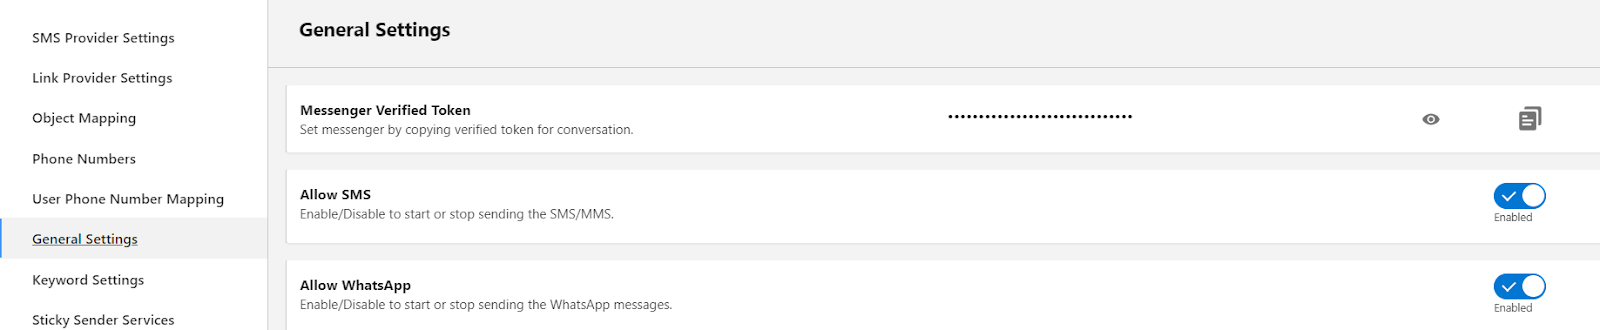
- Enable the Allow SMS toggle for SMS functionality and Allow WhatsApp for WhatsApp messaging.
- Set the Message Character Limit to control the number of characters in messages.

- Select a Default Channel from the dropdown to be the default messaging channel.

- Ensure the Default Country is set; its code will be appended to phone numbers without a country code.

9. WhatsApp Neo
- Go to setup ⟶ quick find box ⟶ search for "Sites" ⟶ "New"
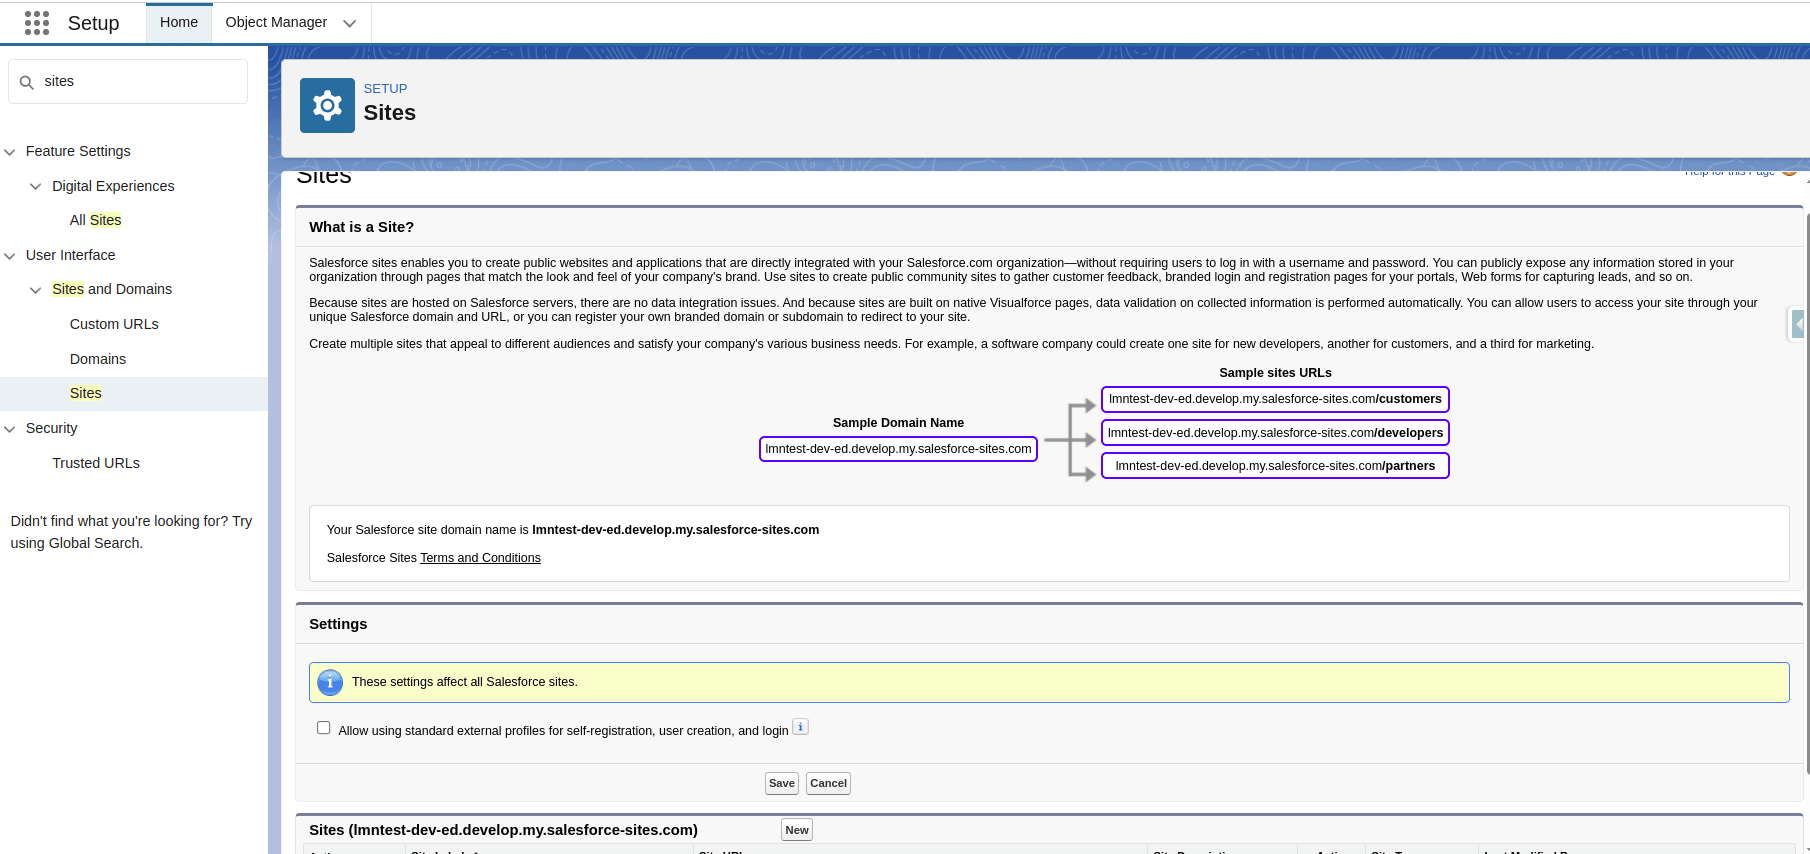
- Enter "Site Label"; it should be unique and without spaces. (This will be displayed on UI)

- Enter "Site Name," which can be the same as (This will be used when referencing the site in API)

- Active checkbox should be enabled.
- Use Visualforce pages for your site in the "Active Site Home Page" section. Give the under-construction page as given in the below screenshot.

- Keep the rest of the fields as set default and click Save.
- Click on the Public Access Settings button.

- Hit Ctrl+F and search for ‘Custom Settings.’.
- Enable the checkbox of ‘View All Custom Settings.

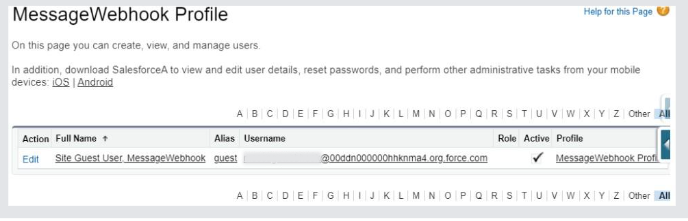
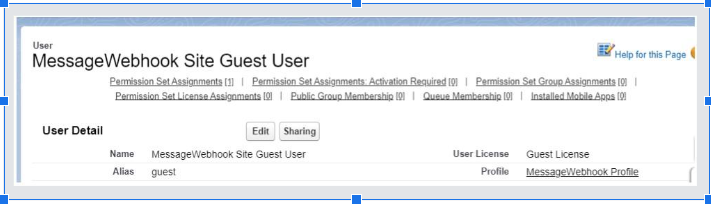
- Click on Site Guest User, Message Webhook.
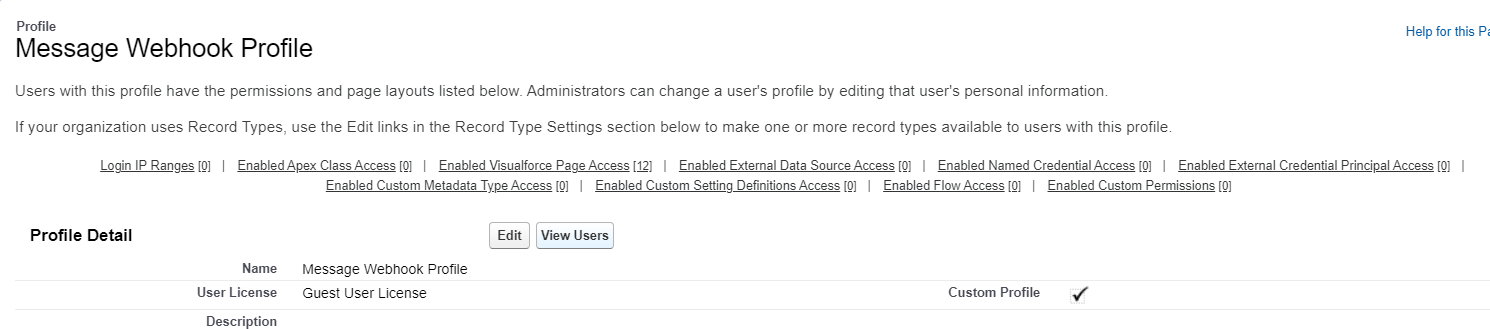
- Click on Permission Set Assignments.
- Assign SN Guest Permission Set to this user.
- Click on Edit and Scroll Down.
- Click on Object read Check Box where You want to Allow Bot
- For custom objects (__c), the object should be searchable ”Allow Search” & Read permission for the same object and fields shown in “Enable Object Permission For Site User Setup”. Setup > Object Manager > Custom objects (name) > Edit.

Configuring Site URL in Meta Developer Account
Configure the Site URL in Twilio to update SMS delivery status and to get a reply of SMS back in the Salesforce org.
- Go to the site created in the above step by clicking on the site name.

- Go to the Custom URLs section and copy the Domain Name URL.

Add https:// as a prefix in this URL as highlighted in bold
https://yourDomainName.com
and suffix as /services/apexrest/ks_sn/incoming_message/ as highlighted in bold
https://yourDomainName.com/services/apexrest/ks_sn/incoming_message/
Add ks_sn in the suffix part highlighted in bold
The final URL looks like below
https://yourDomainName.com/services/apexrest/ks_sn/incoming_message/
WhatsApp Business Account Setup
- Facebook login: Need FB Business Account and Login if not ‘Create an Account’ from Facebook - log in or sign up
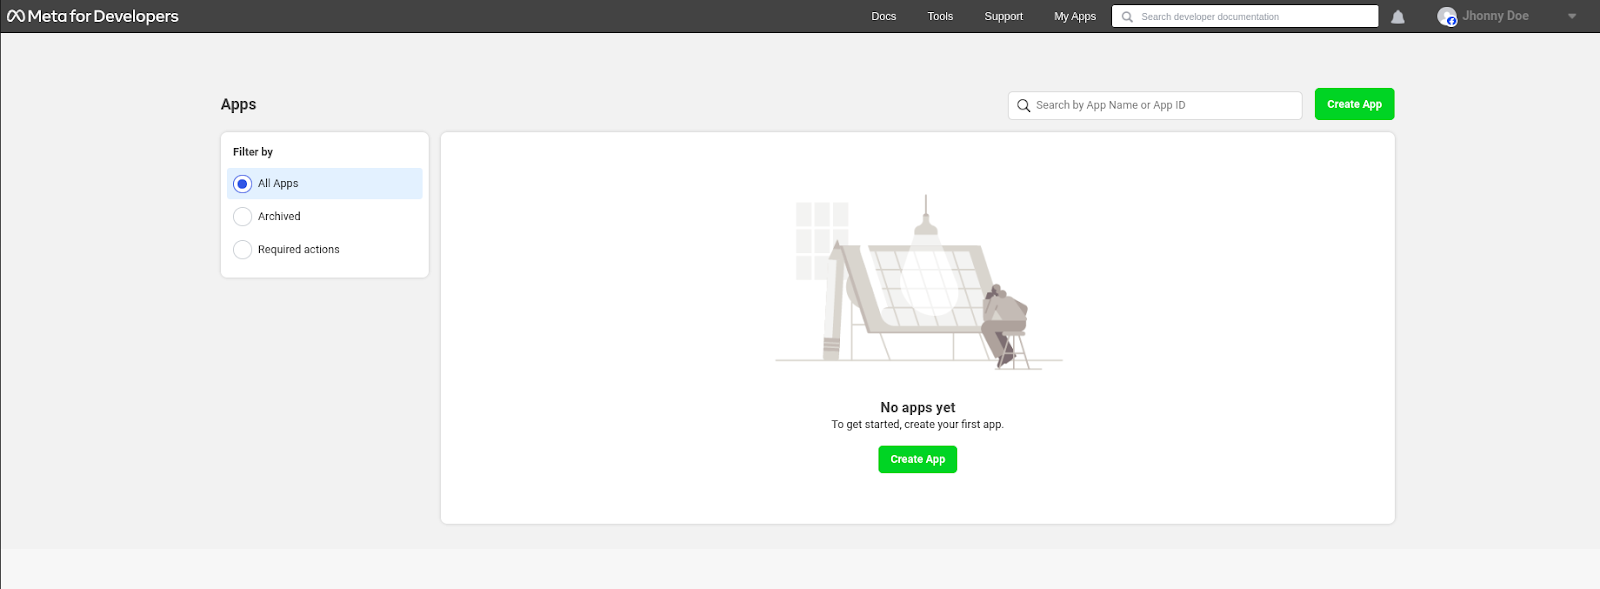
- Create Application - Click/Paste URL https://developers.facebook.com
- Click on the ‘Get Started’ / Apps.

- Click on ‘Register’ present on the left side . Continue. Verify your account by filling data and continue.
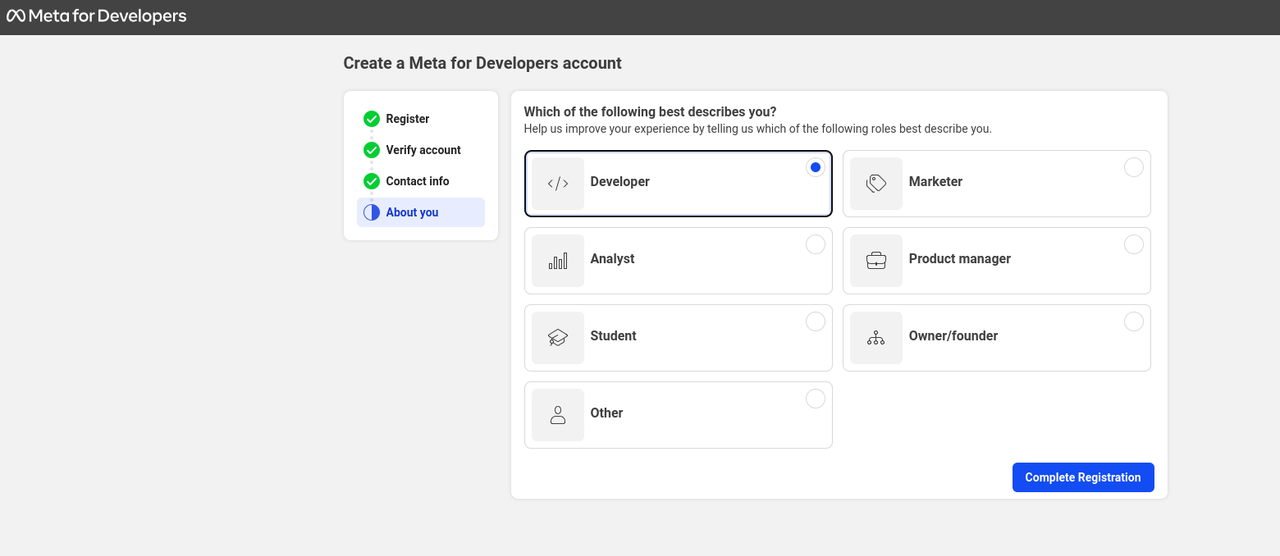
- In ‘About You’ Tab select Radio button for ‘‘Developer’

- Click on the ‘Create App’. and then choose the user radio button and then Next
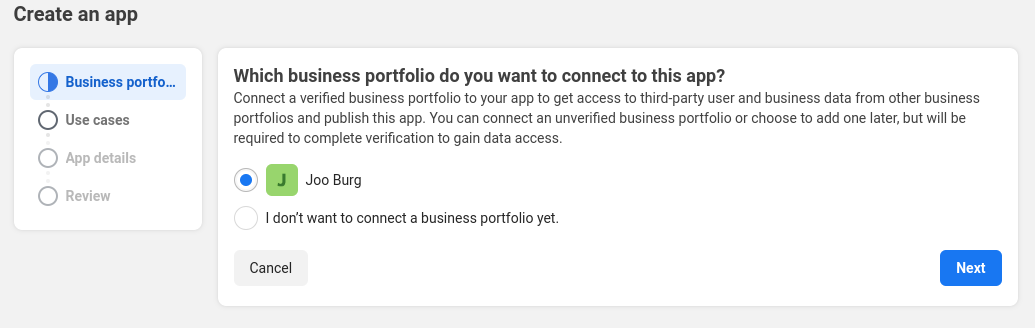
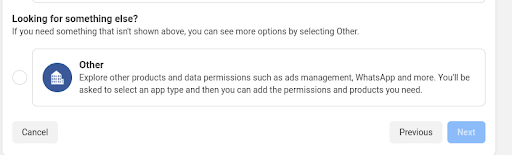
- Select ‘Other’ by using the radio button or Click on Other box . Then click on Next
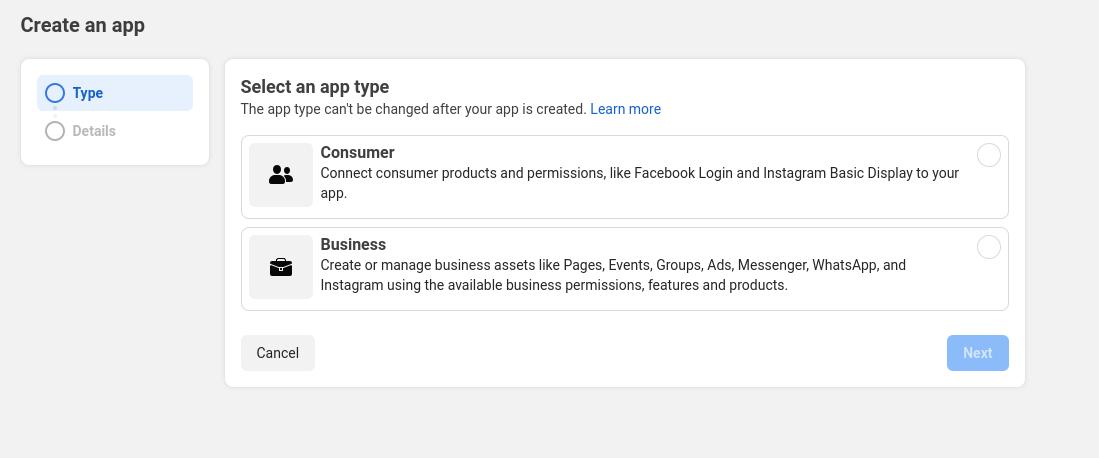
- Select Type as Business and Click on next
- Fill App Details continue.

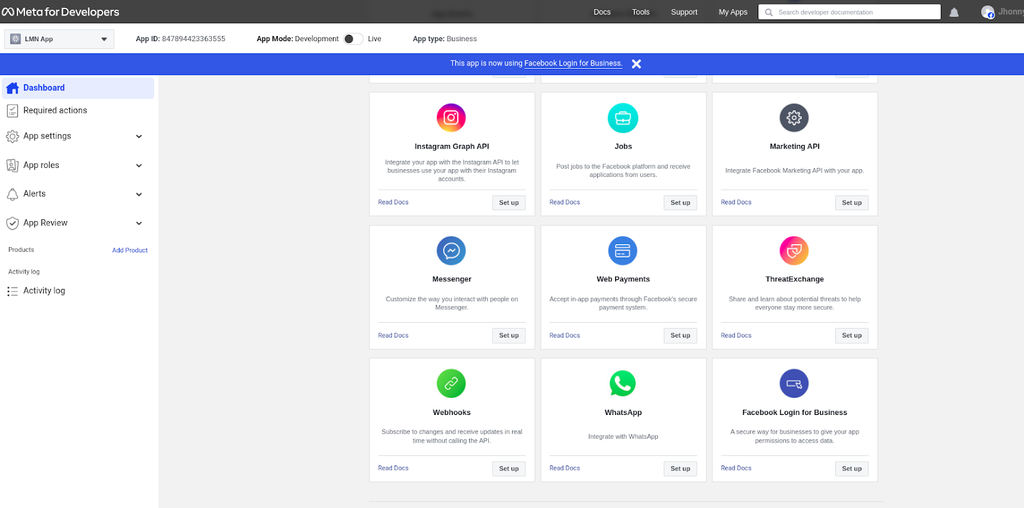
- On ‘Dashboard’ click on WhatsApp ‘Set up’.
- Click on the WhatsApp ‘Setting’ tab.
- After click on the tab you will see the below page
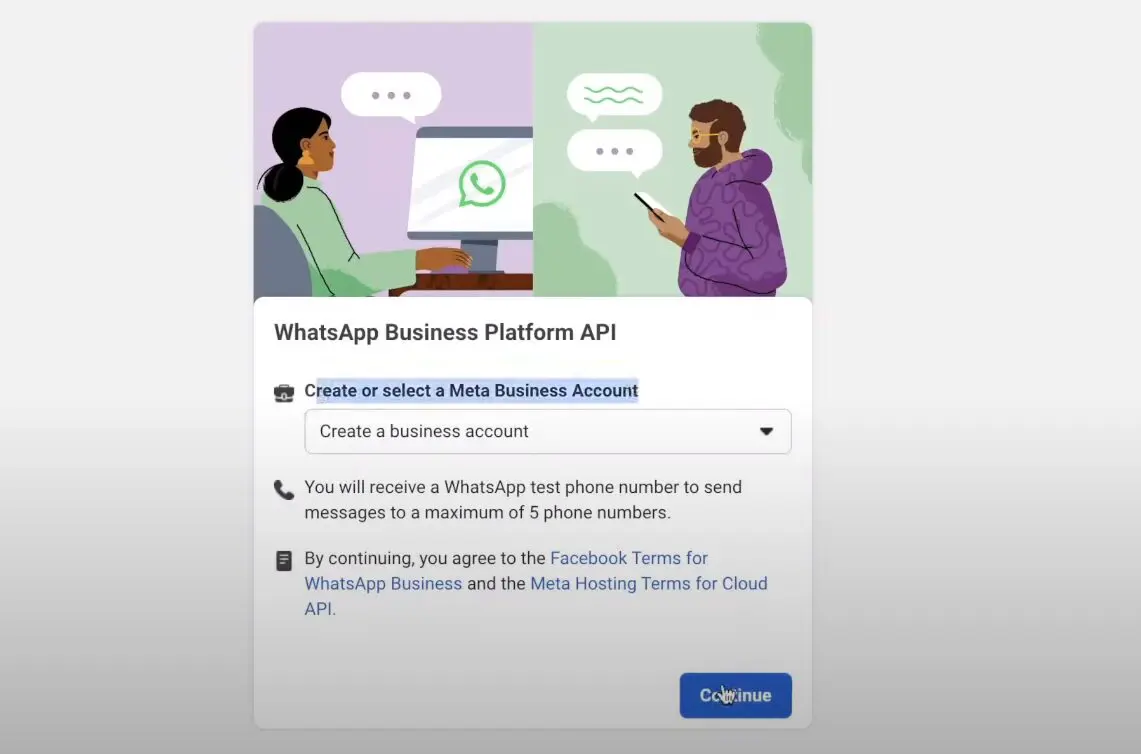
- Click on a create business account and Continue.
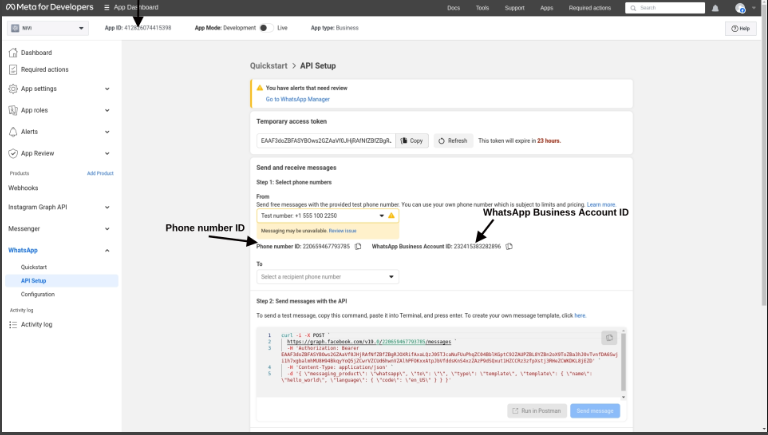
- Click on Whatsapp → API Setup
- Note down the Whatsapp Business Account ID
- Note down the Phone number ID
- Note down the App ID
- Note down the From Number
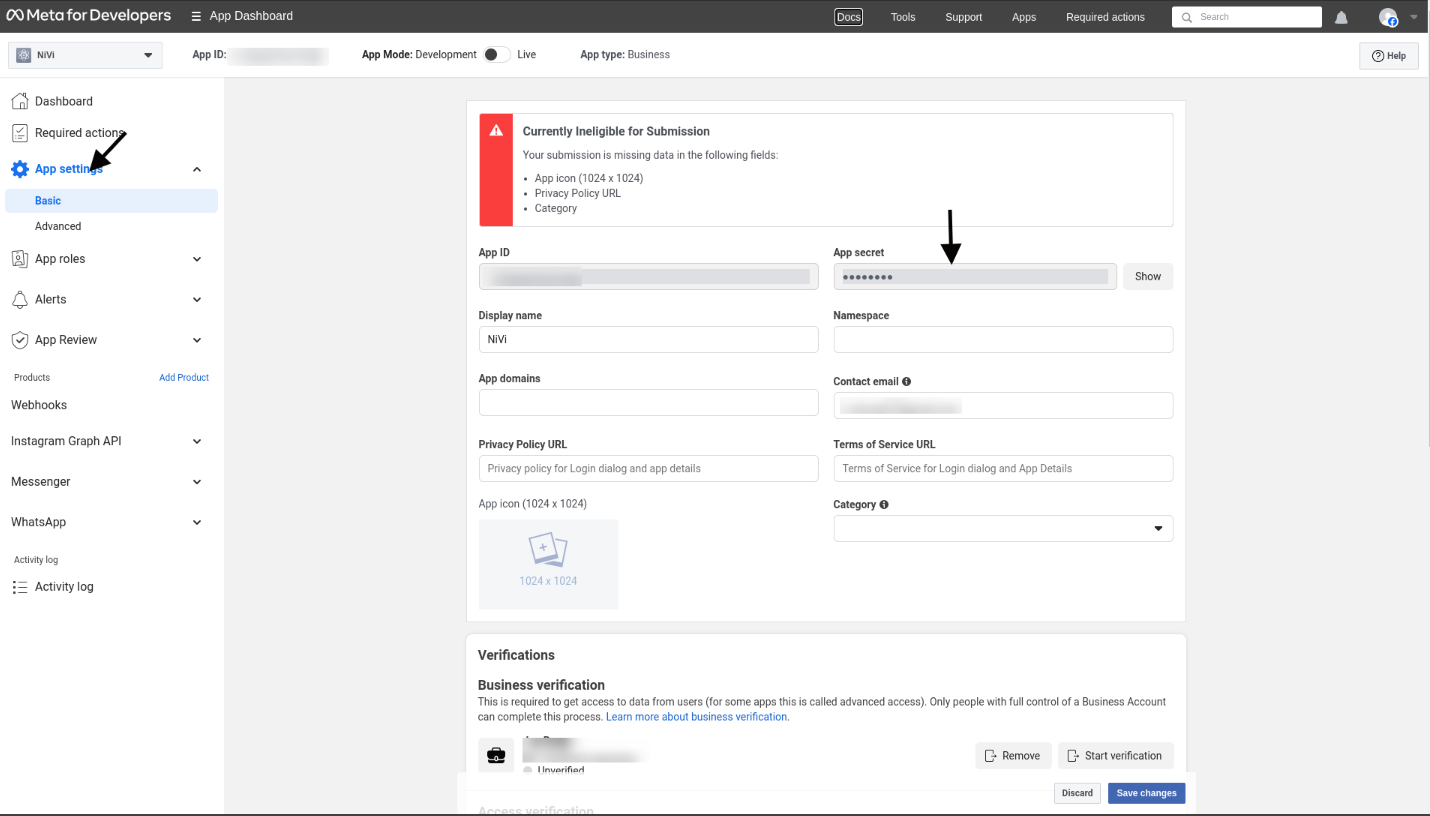
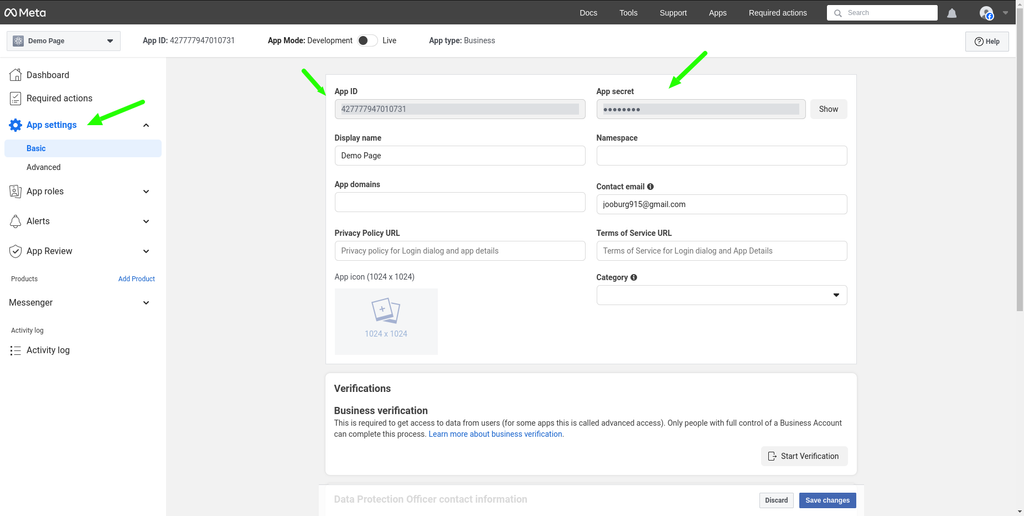
- Go to App settings → Basic → Note down the App Secret.
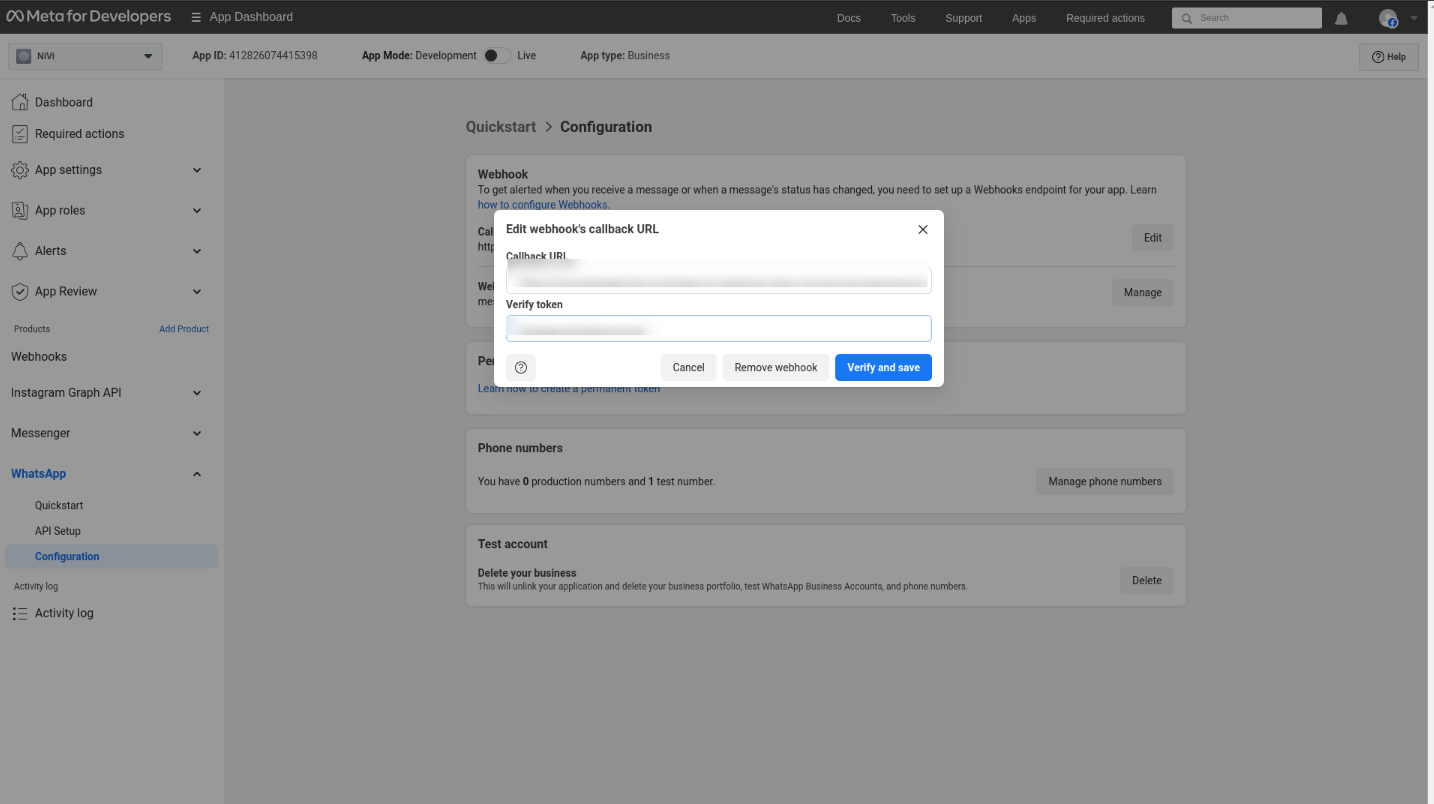
- Go to Whatsapp → Configuration → Click on Edit → paste callback URL. ( paste the URL created in the above step in front of this Webhook drop down. Please refer to the screenshot below).

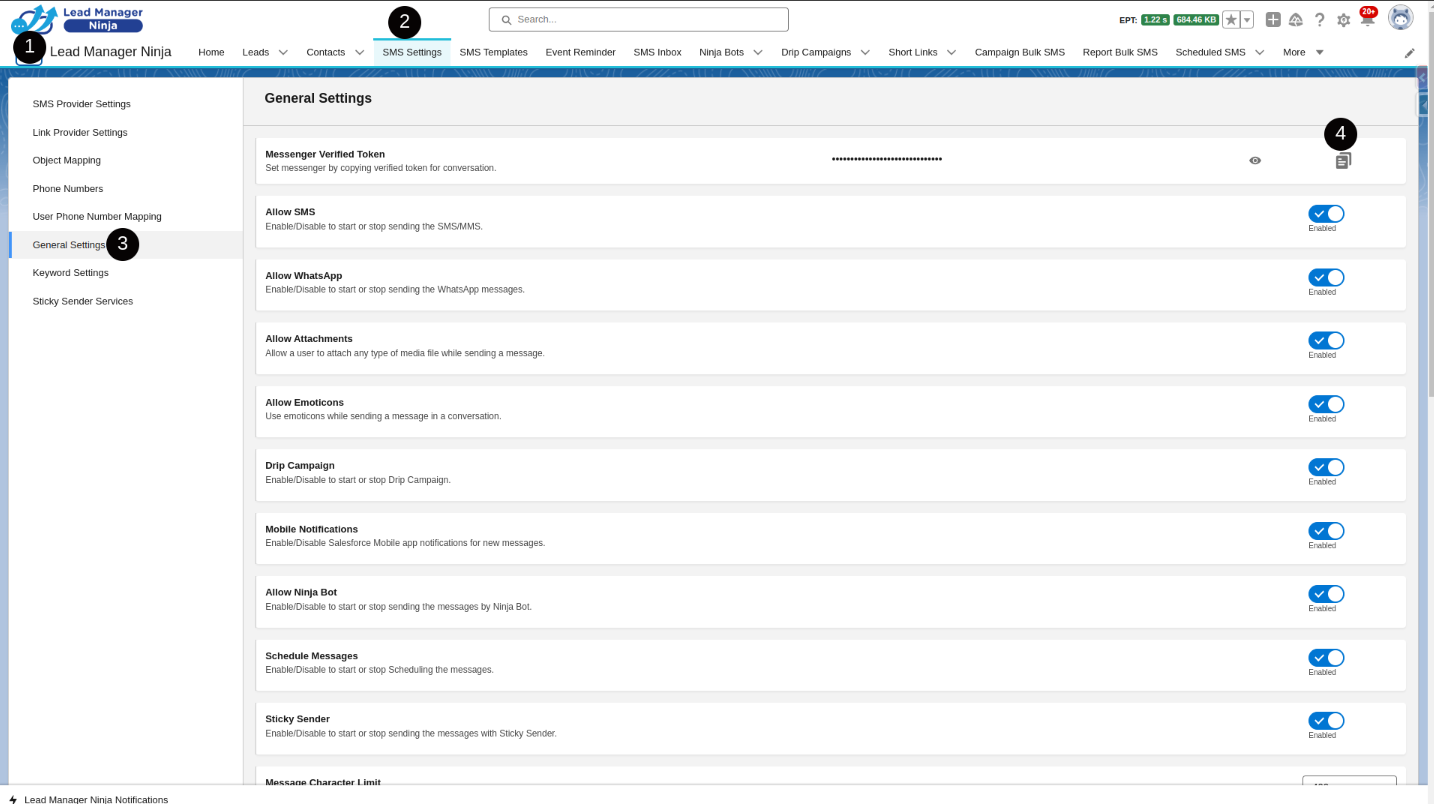
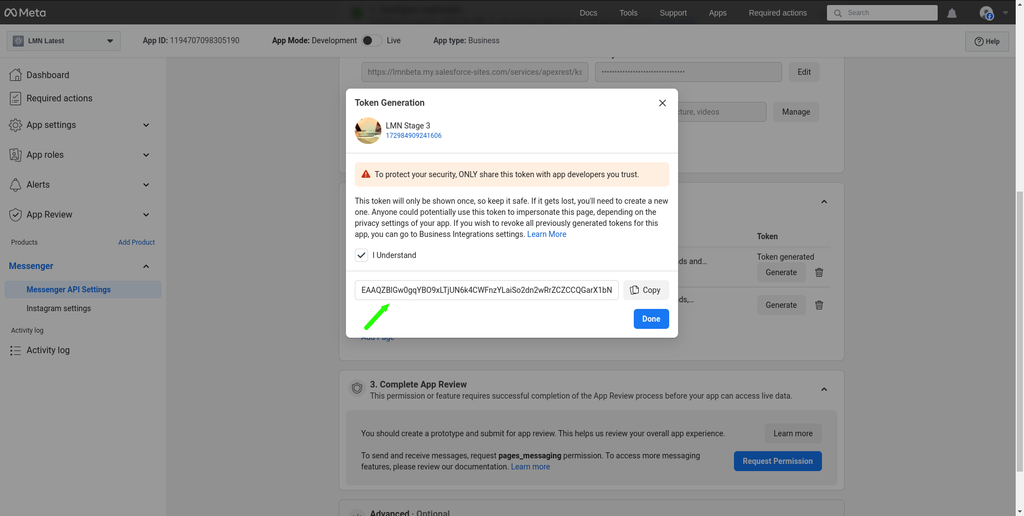
- Now go to Salesforce Org → Click on Apps → Search “SMS Ninja” → SMS Setting tab → Go to General Settings → Copy ‘Messenger Verified Token’.
- Under 'Verify Token,' enter the Messenger Verified token.
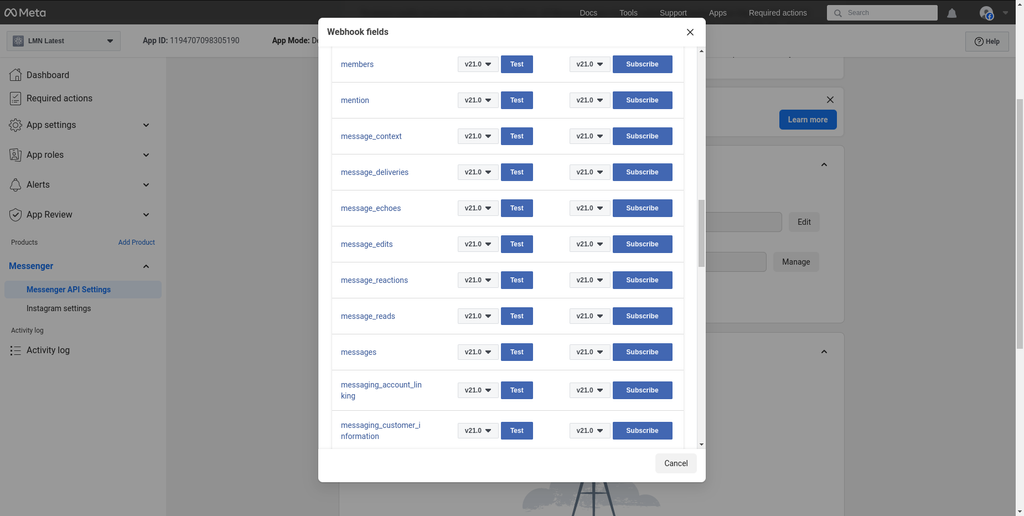
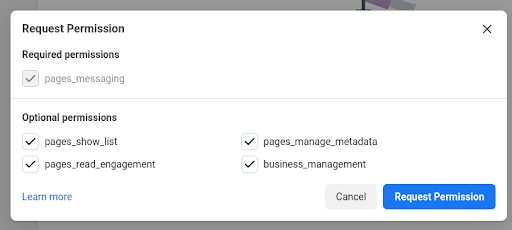
- Click on the Manage button and assign the three permissions below.

Meta Developer Account Live
- Go to App Settings → Basic → fill the Privacy Policy URL and Category.
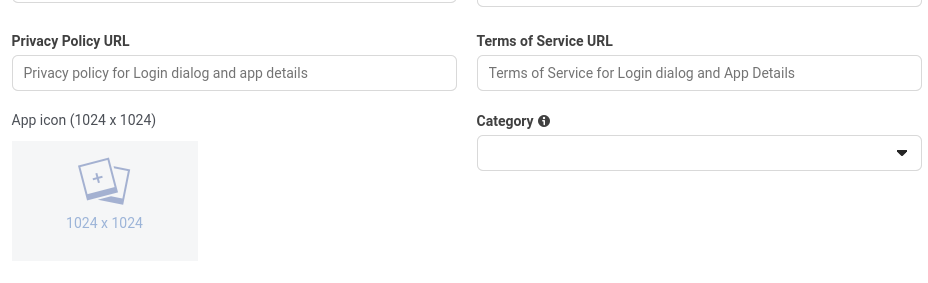
- Click on save changes.
- Start Business Verification and fill the information, submit it.
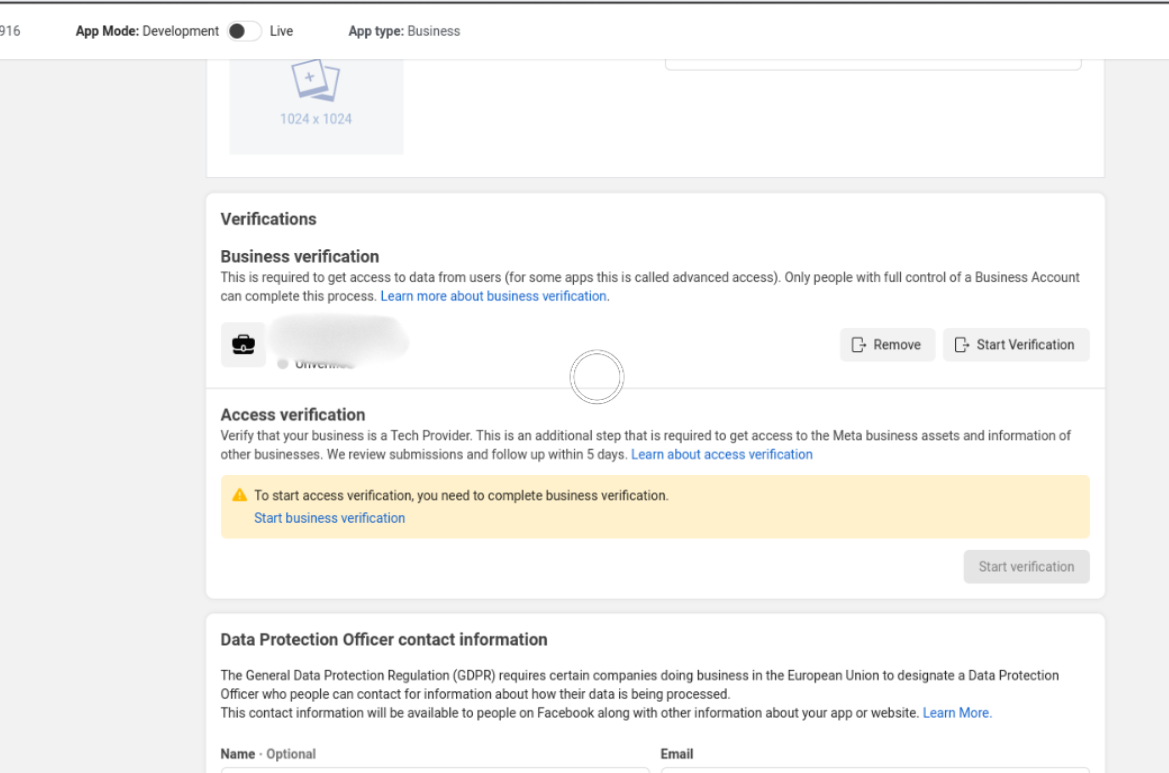
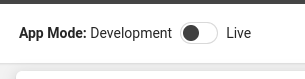
- After this you have to turn on the toggle for making your application live.
WhatsAppNeo Permanent Token
- Go to Whatsapp → Configuration → Learn how to create a permanent token → Meta Business Suite → Click on settings
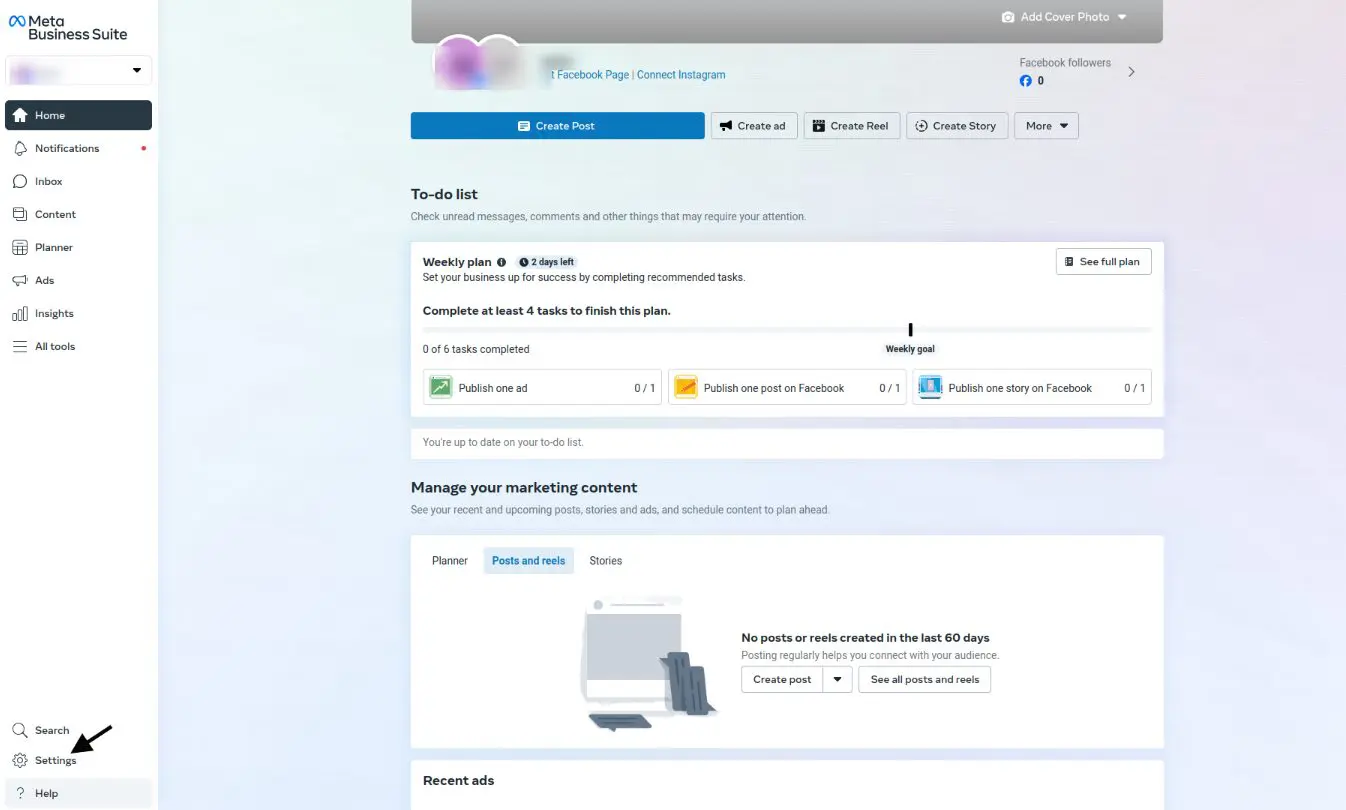
- Now, you will redirect to the ‘Meta Business Suite’ and follow the steps -
- Users → System Users → Click on Add Button → Create system user → Assign role as Admin.
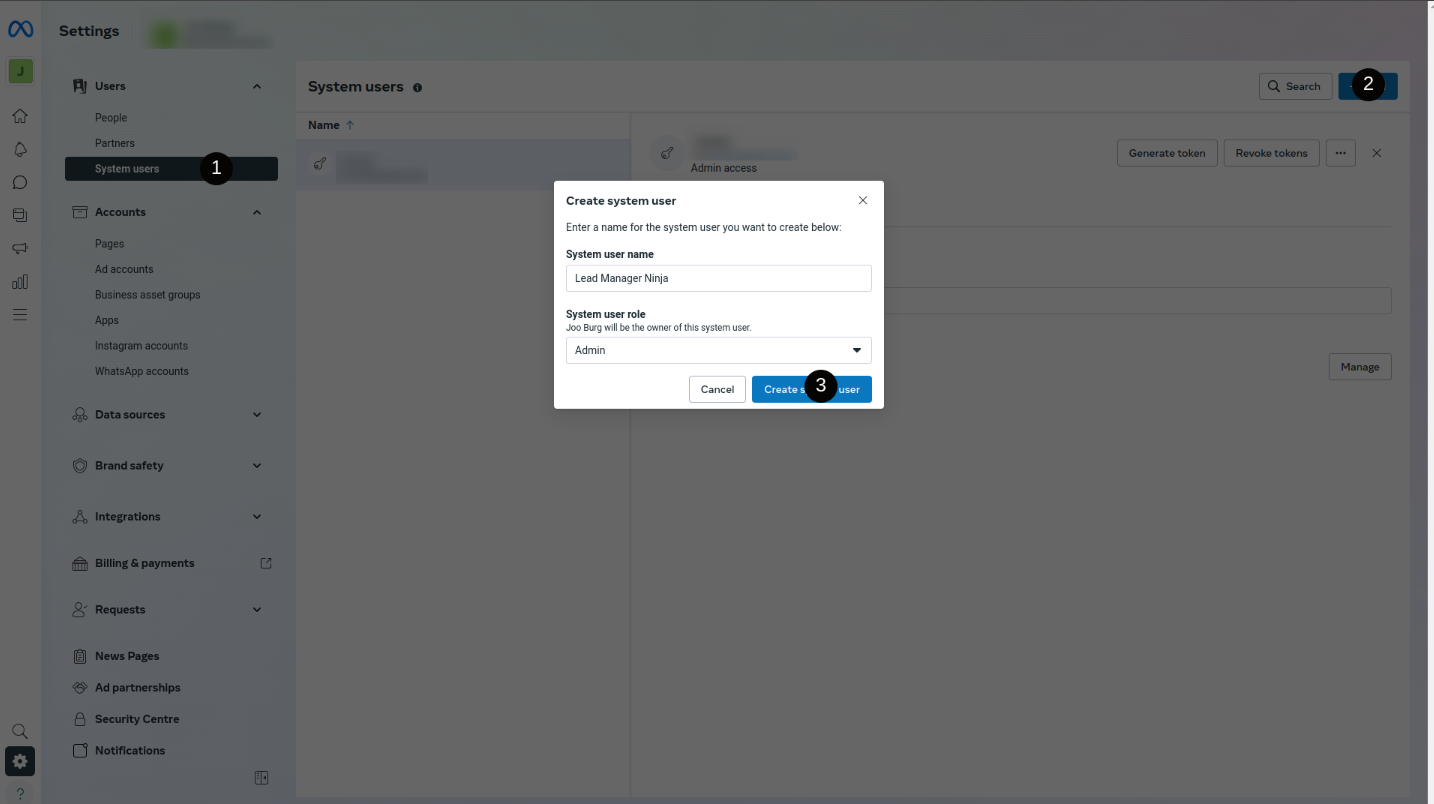
- Click on Assigned Assets → Apps → Assign Full Control → Done.
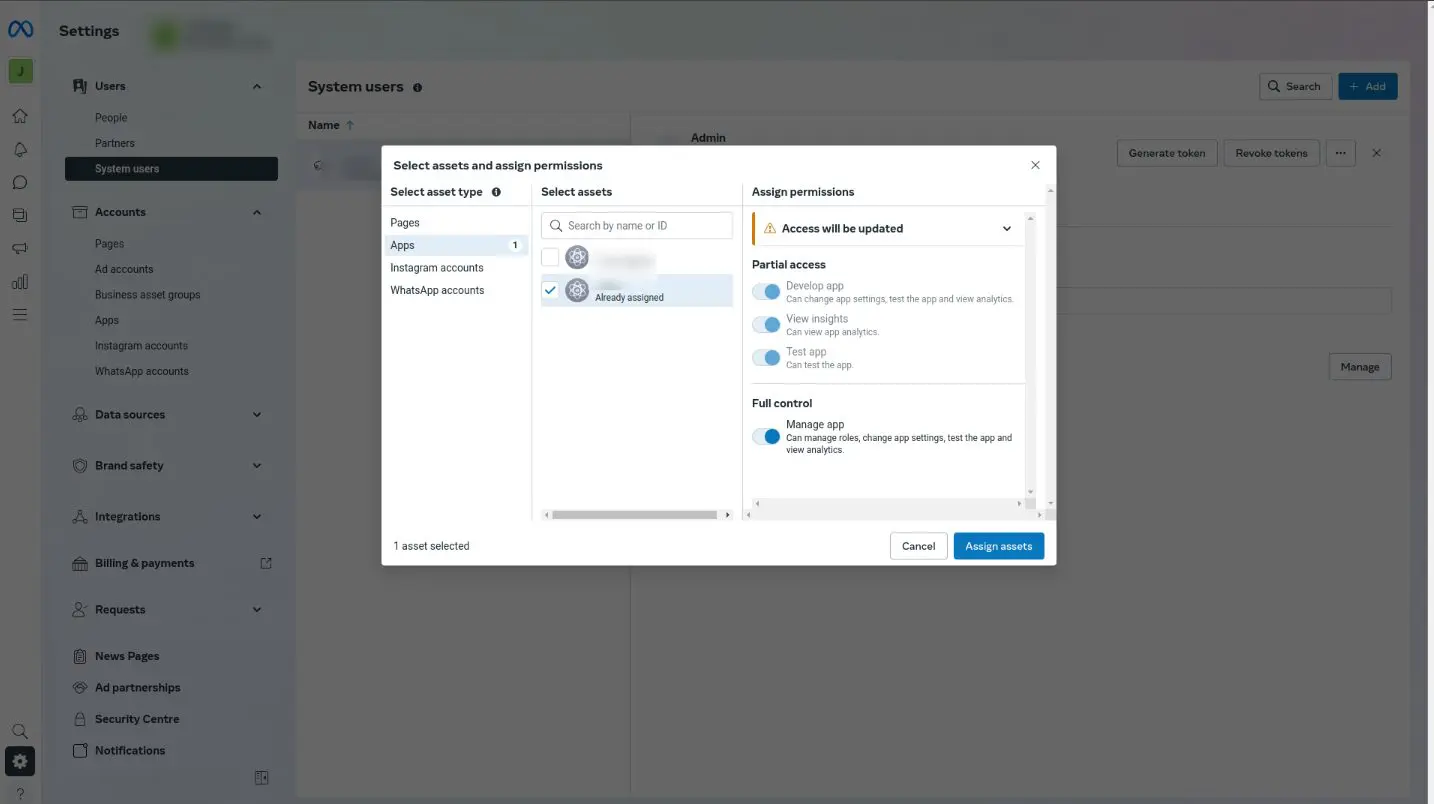
- Click on Generate token → Select App → Next → Select token expiry → Assign Permissions (whatsapp_business_management and whatsapp_business_messaging) → Generate token → Note down the token.
Configure SMS Provider in Salesforce
- Add Provider: Go to SMS Settings Tab → SMS Provider Settings → Click New.
- Choose WhatsApp Neo and fill in the credentials noted earlier.
- Set the status to Active.

Phone Numbers Configuration and User Number Mapping (Respective User)
- Add Phone Numbers: Add company phone number in phone number configuration; at least one phone number must be configured.
- Go to salesforce org → SMS Settings Tab → Phone Numbers → Click on New → Choose WhatsApp Neo → Fill the details ( Such that friendly name, phone Id which you note down above steps, choose the country and put the number i.e. if you have done with verification then put purchased number otherwise test number) → check the WhatsApp Neo checkbox → click on Save and Assign.
- After clicking on Save & Assign, Assign the number to the user which is being used for sending the whatsapp messages.
Template Creation for WhatsApp Neo
The steps for template creation of Whatsapp neo are given below :
- Create Templates: Go to SMS Templates → Create a Folder for WhatsApp Neo.
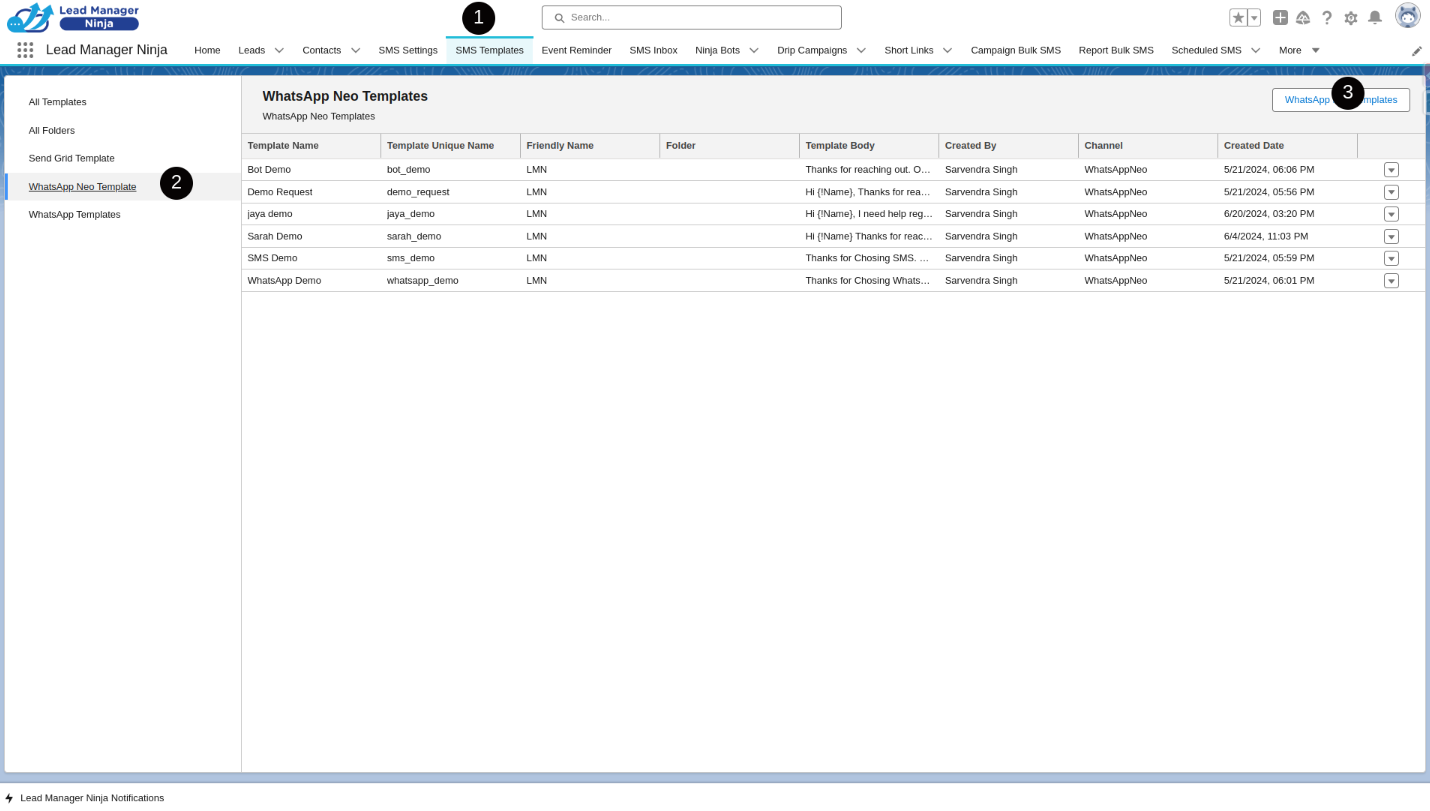
- Click on Whatsapp Neo Templates → Click on New → Fill the details like below.
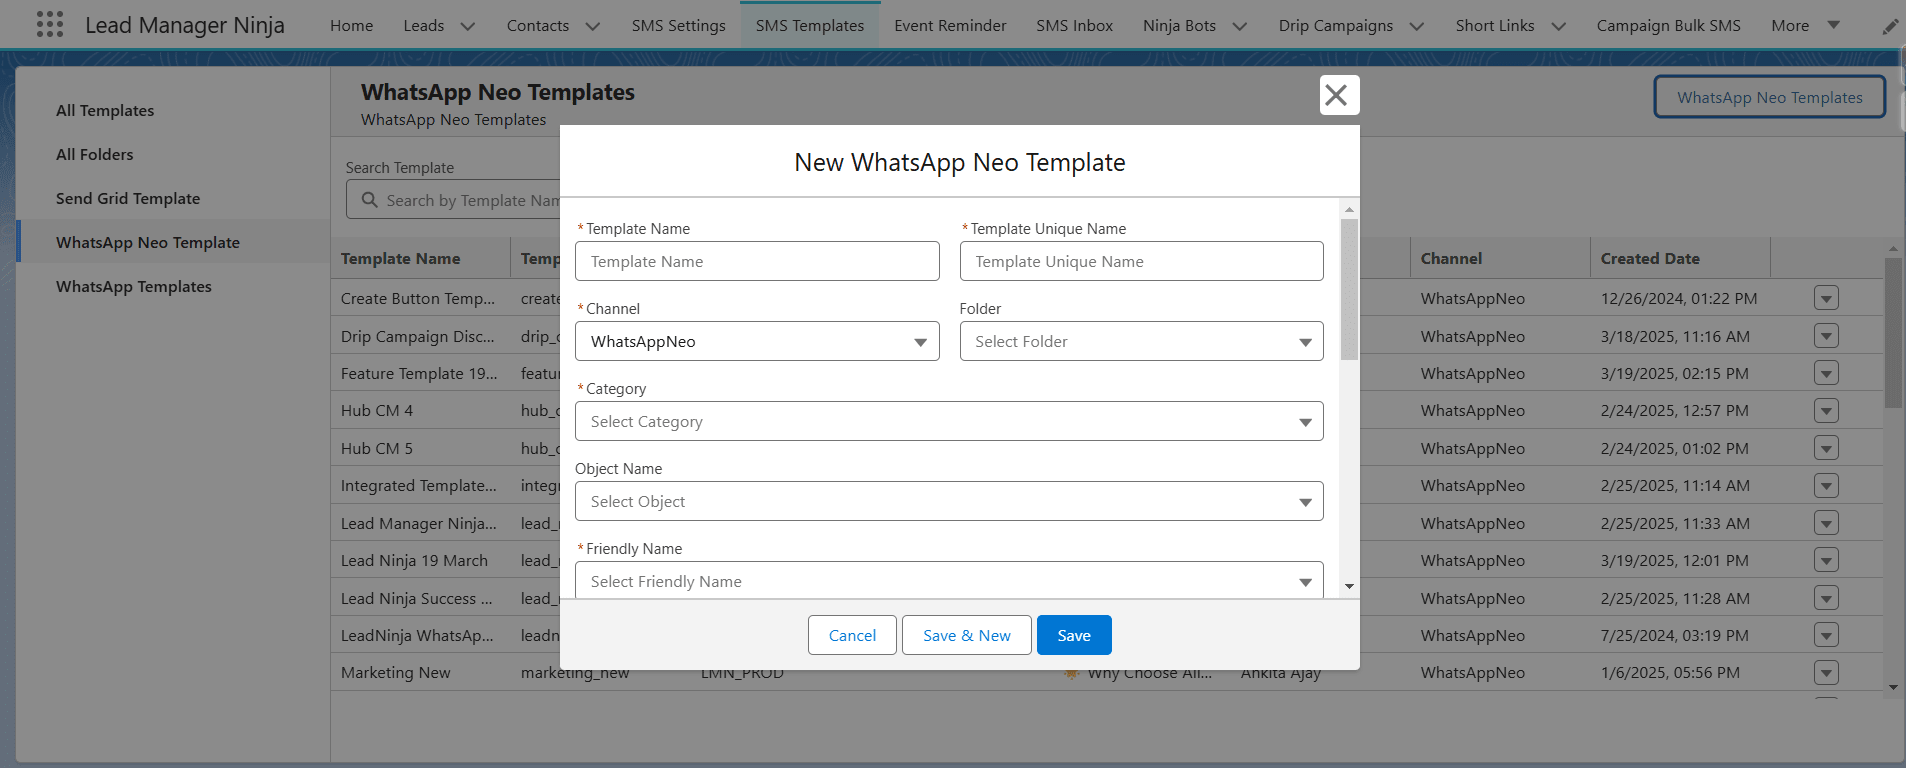
Note : The maximum allowed character in message body for the WhatsApp Neo template is 1024
- In this template, you can add Media also by choosing from the Header Value pick list as a header attachment, or you can add header text by choosing header text.

- When you choose Header Text, a Header field will appear where you can add text in the field
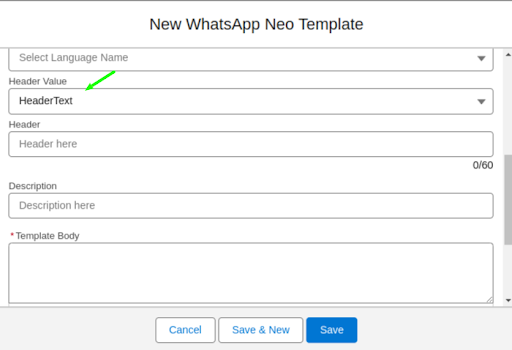
- Once you choose Header attachment ; attach file icon on the modal will appear
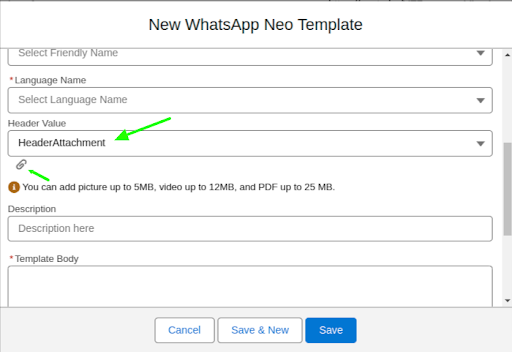
Note : You can add either Header Text or Header Attachment in template
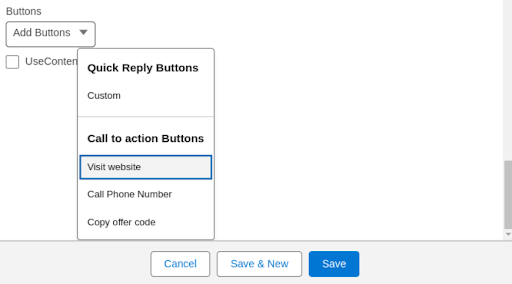
- In Add buttons you can simply add Quick Reply Action Buttons ; up to 10 buttons for quick replies by clicking on Add buttons

- You can also add Call to Action button i.e phone number Button, URL and Copy Code.
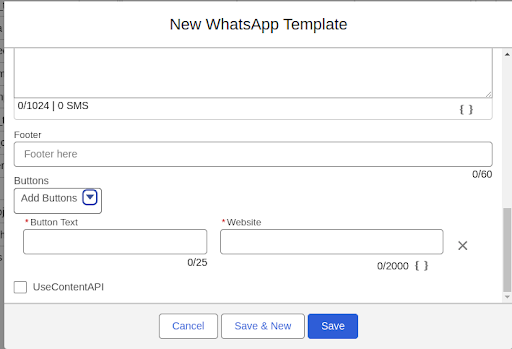
- In URL, now you can create dynamic URLs also by inserting a merge field in it, which is near the website text box at buttons.
- In the end, you have to check the useContentApi checkbox for creation of Template on the WhatsApp server. → Click on save.
- It is mandatory to check the UseContentAPI checkbox; otherwise, the template will not be created on the meta side.
- If not, it will be present in org, but after sending, it will be failed
- Click on Save.
Points to be remembered at the time of creation :
- You can also make the text in the template bold by adding * before and after the text.
- The character limit for Header and Footer is 60 characters
- You can add the message body up to 1024 characters
- If there is a merge field in it, it will count the characters in the merge field but will consider the character count when it gets changed at runtime also.
- Make sure you have entered the Enter key only once if you want to start a new line in message body after writing one line in body.
- Once the template is created, you can now use it and send it to users using WhatsApp Neo channel at one-to-one and bulk messaging by choosing template from insert icon at SMS pallet.
10. Facebook
How do I do Facebook account setup?
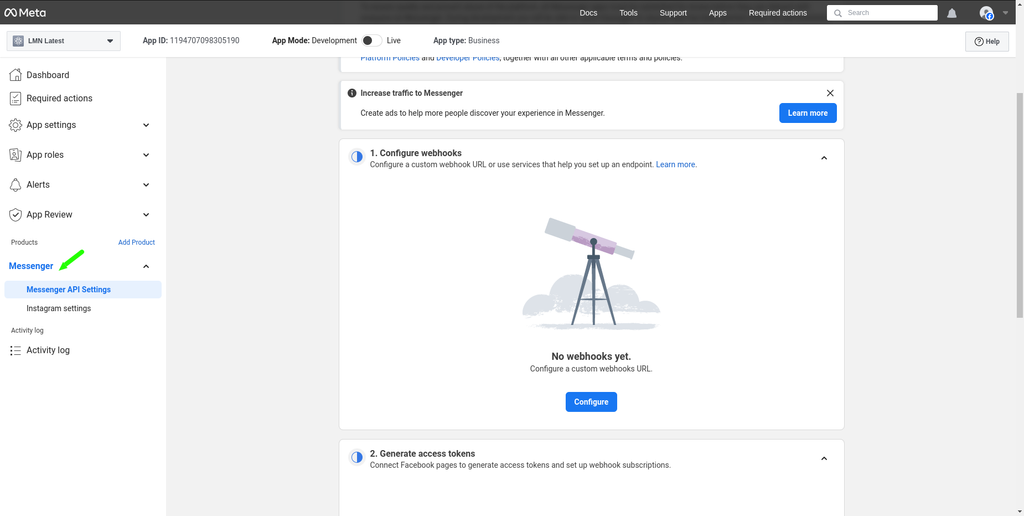
- Go to "Dashboard" and click on "Messenger" to set it up.
- Click on App settings → Basic
- Copy your App ID and App Secret.
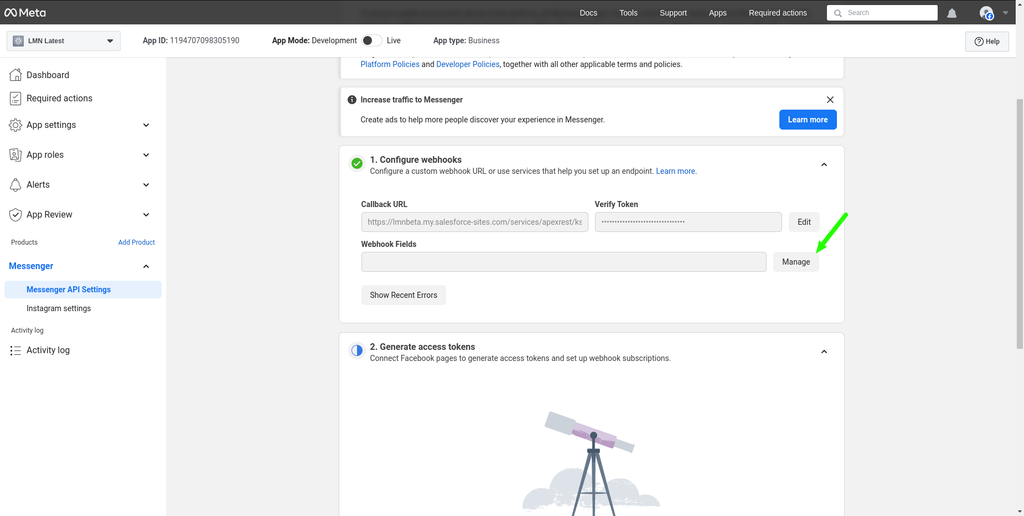
- Under Messenger Settings, paste the callback URL created earlier.

- In Salesforce, go to "Apps" > "SMS Ninja" > "SMS Setting" tab > "General Settings," and copy the "Messenger Verified Token."

- Paste the Messenger Verified Token under "Verify Token" and click "Verify and Submit."

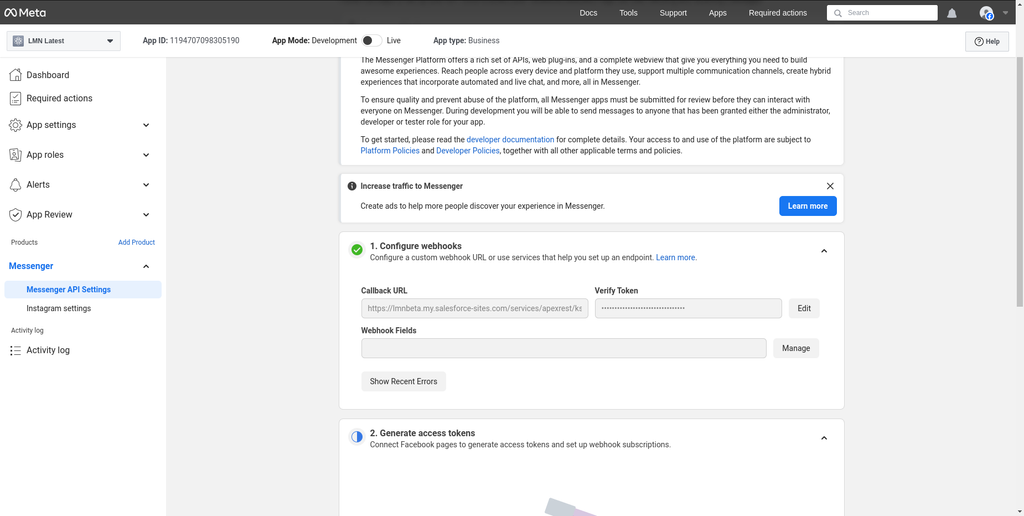
- Click "Manage" and subscribe to the webhook fields.
- Generate a token using the "Connect" button.
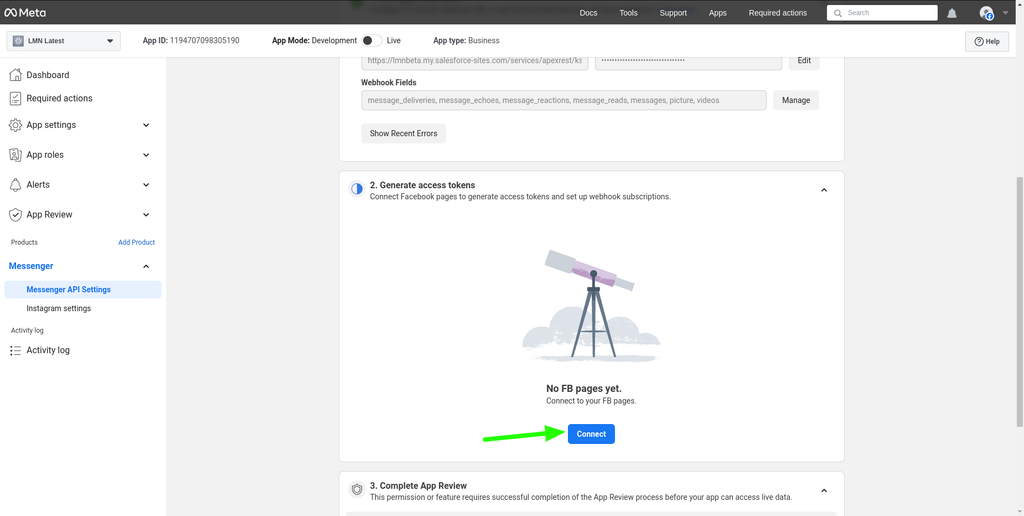
- Choose your page using the radio button and click "Continue and Save."
If you haven’t created a page, go to Facebook and create one. Steps to create:
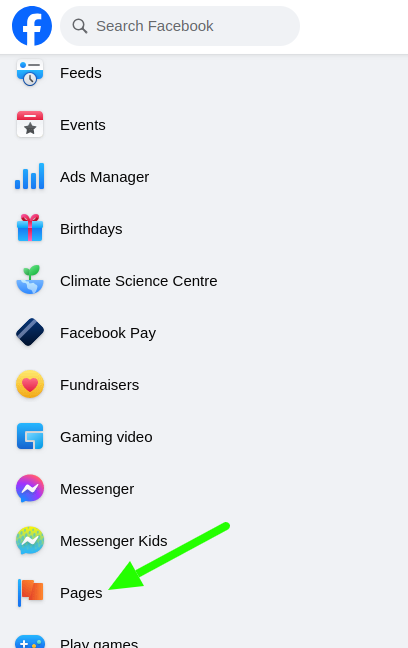
- Facebook Login → See more → Pages (in left menu)
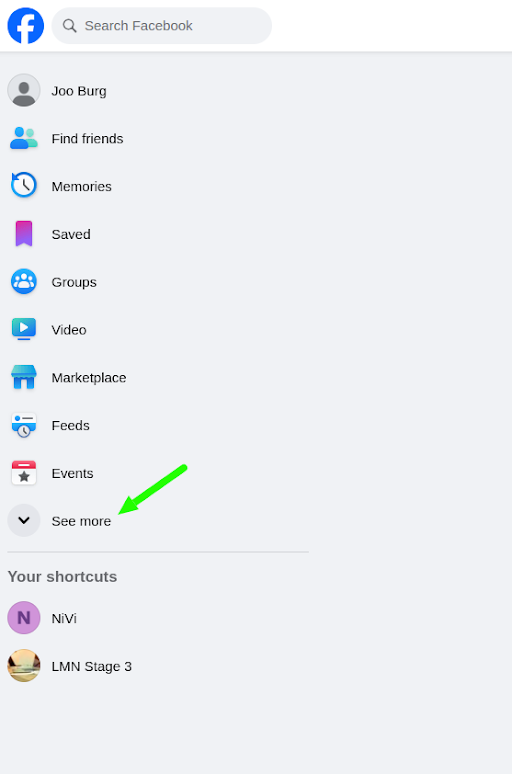
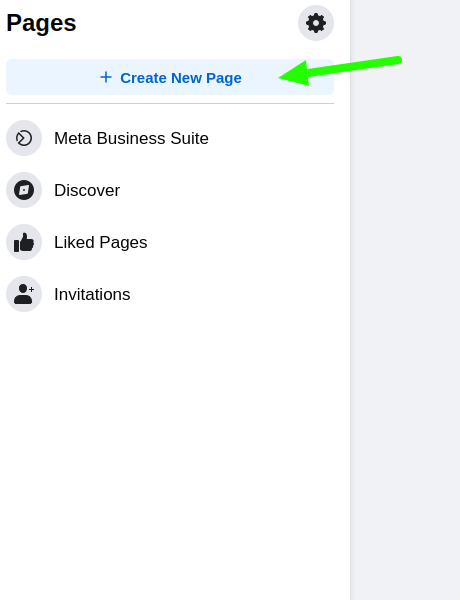
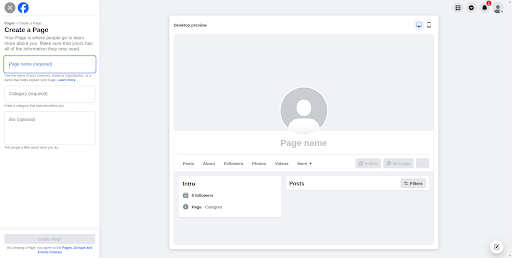
- Click on Create New page and fill in the details
- Once done, Add subscriptions to your page and Generate tokens using Generate button

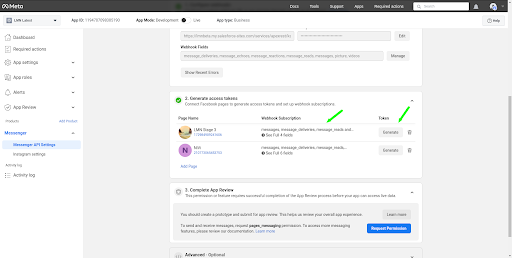
- Once done, generate the token and note the page ID.
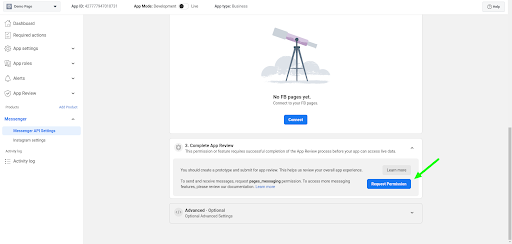
After this, all your setup is done at Meta. You can also Request Permission in case you have not already for messaging.
Prerequisites:
- Ensure the object has the chat console and valid phone numbers mapped.
- Set the Default Channel value in the General Settings tab.
- Note: Communication will begin after receiving the first incoming message.
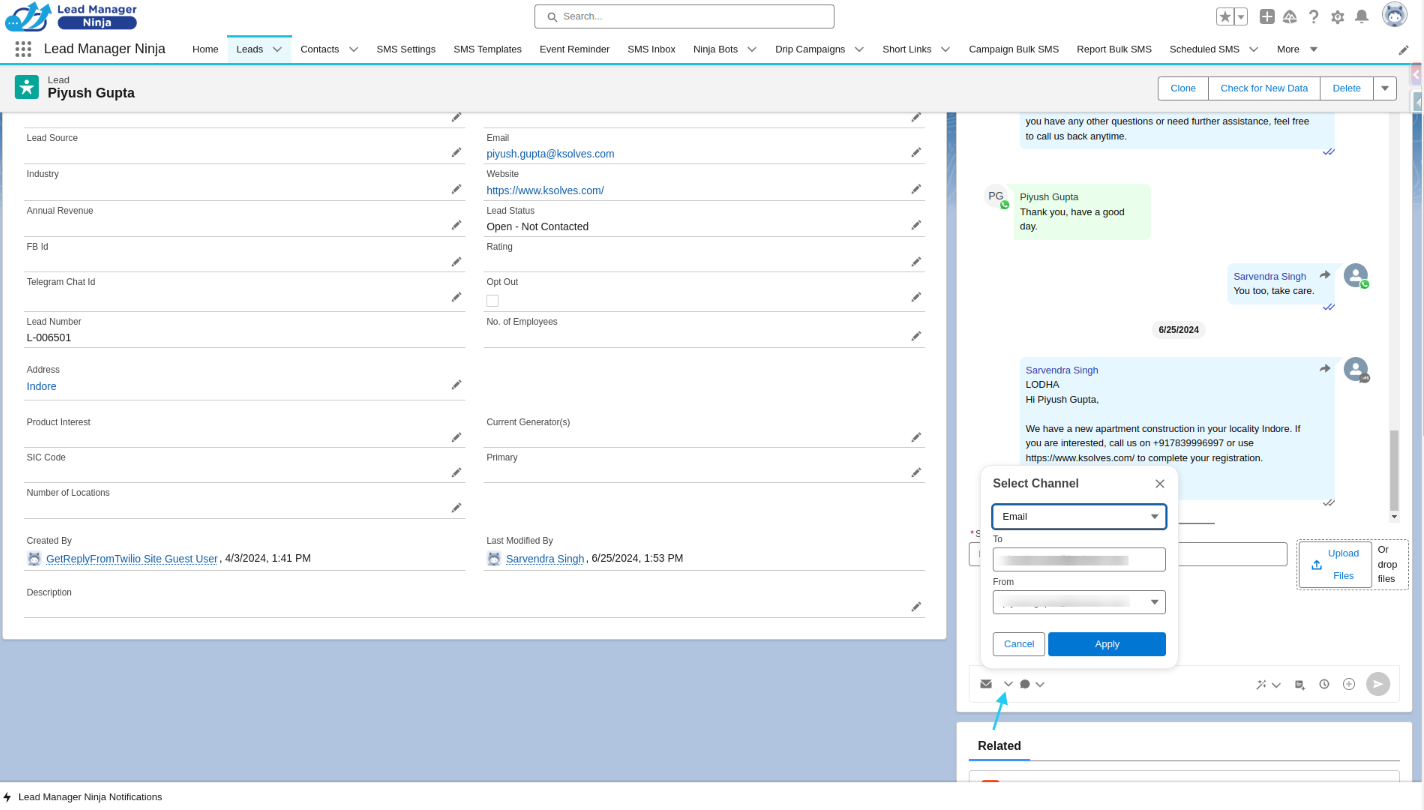
One-to-One Messaging
Note : For communication on Messenger, first incoming should be received at org, which will give the ID, and that will be used as Record to communicate
- Go to the record page of the object with the SMS Ninja Chat Console.
- Select the number and click "Apply" to send messages.
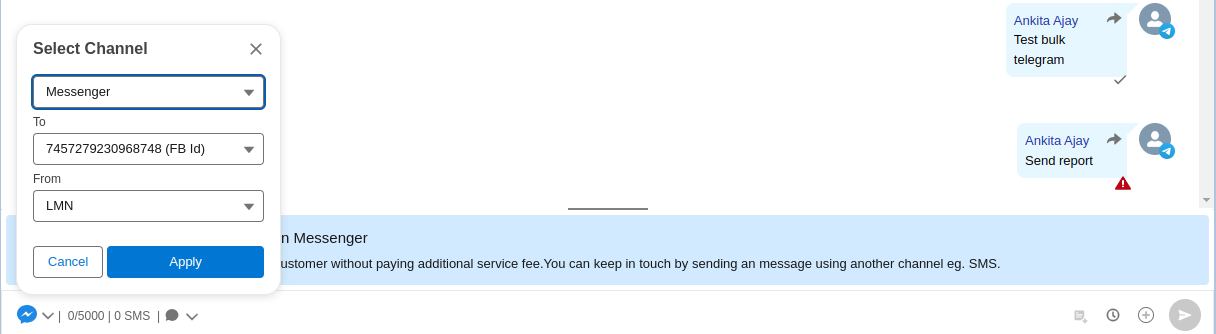
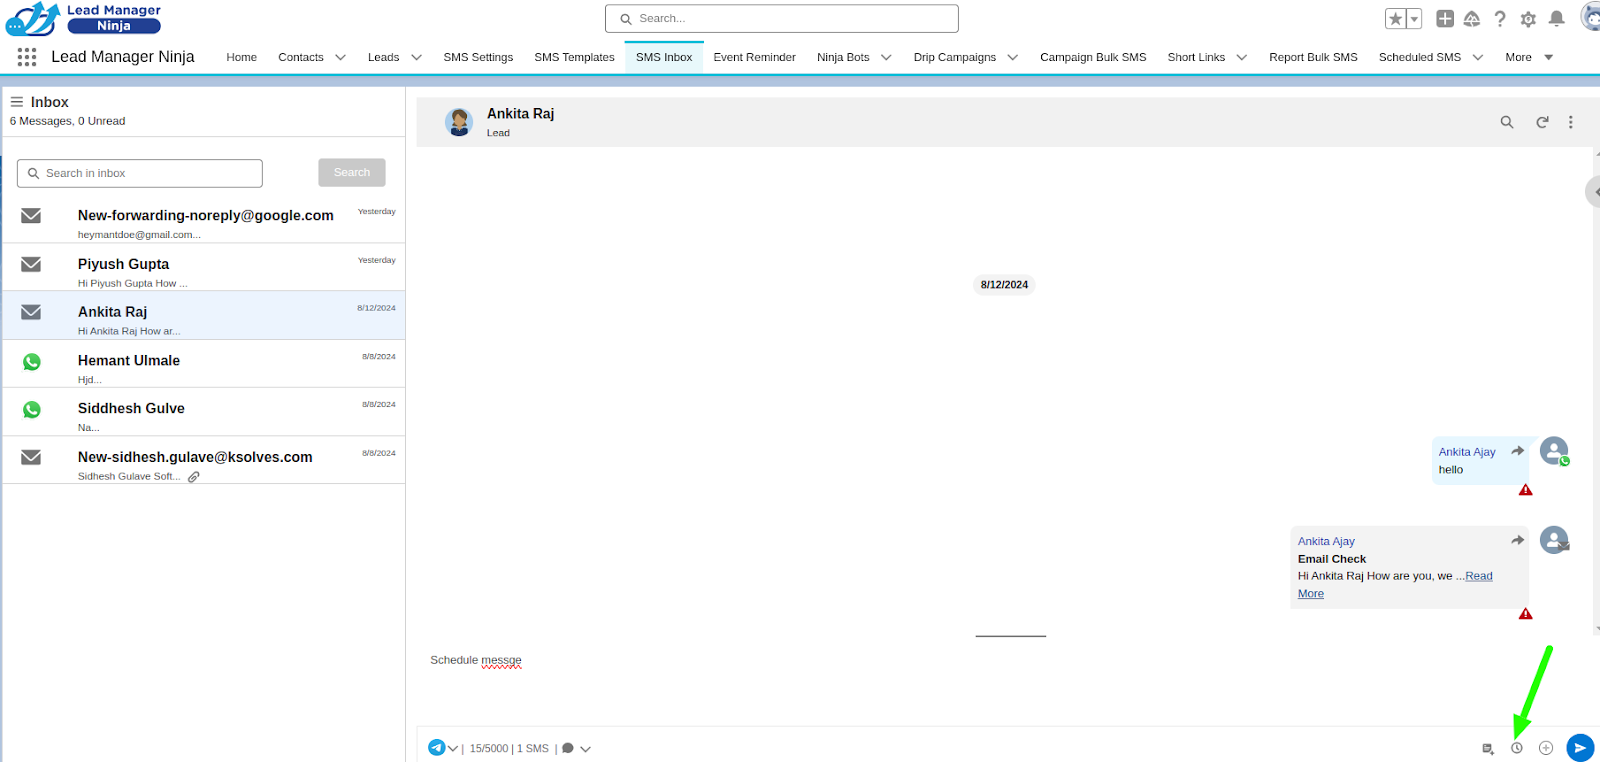
Messaging from Chat Console
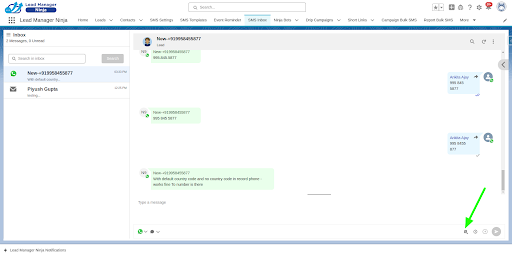
- In the SMS Ninja Chat Console, select the appropriate channel and populate the To Number and From fields.
- Type your message and click the blue send button.
- You can also schedule messages using the clock icon.
11. Telegram
- Install the Telegram app on your device.
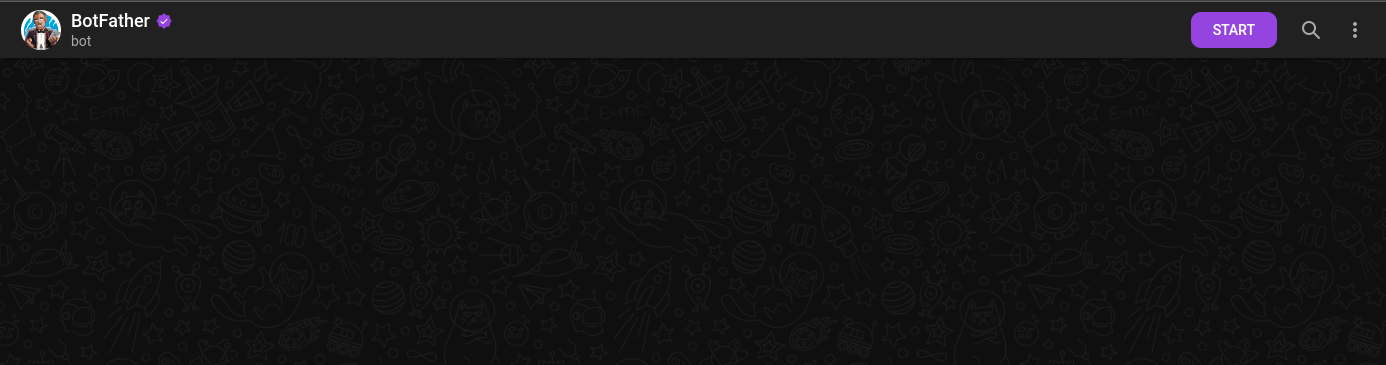
- Open the Telegram app and search for "BotFather" to create a bot.
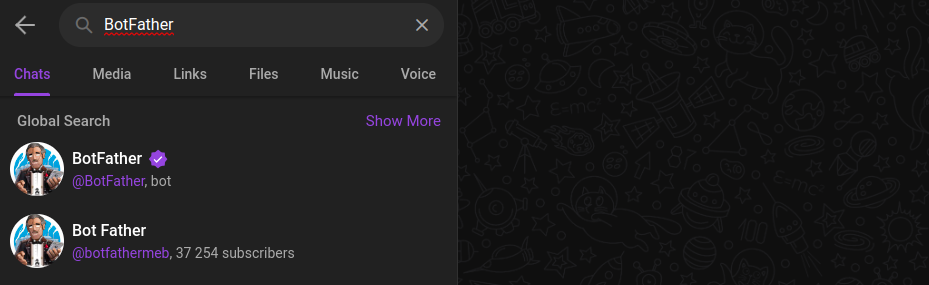
- Click on "Start."
- Type /newbot to create a new bot.

- Enter a bot name (with no spaces).
- Enter the bot name again with "_bot" appended.
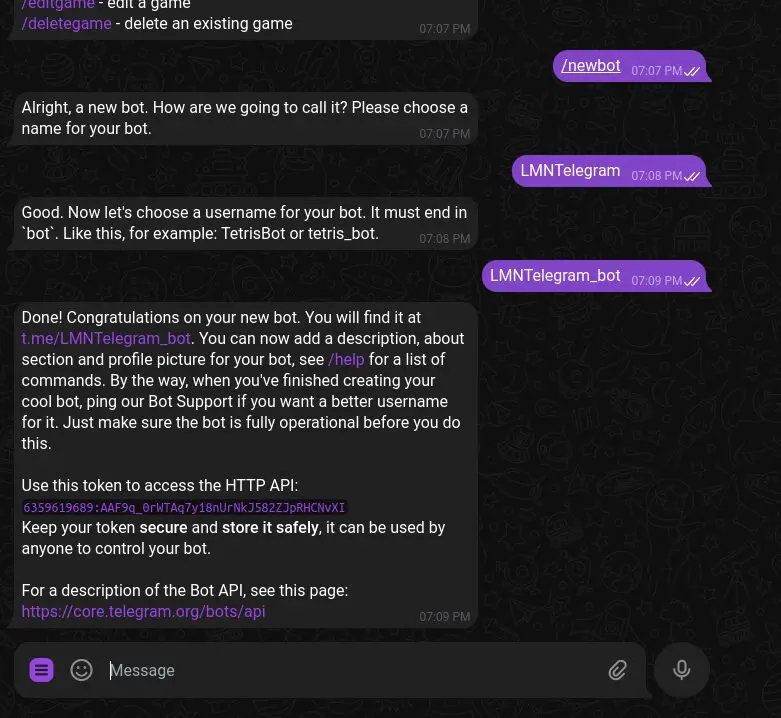
- Copy the tokens provided by BotFather for future use.
1. Configure SMS Provider
- Go to SMS Settings > SMS Provider Setting > New.
- Select "Telegram" a provider, enter Bot ID, and set Friendly Name.
- Enable the Status toggle as "Active."
- Sync the provider for incoming Telegram messages.
2 . Configure Phone Numbers
- Go to SMS Settings > Phone Number > New.
- Select your bot, save, assign users.
3. SMS Ninja Chat Console Setup
- Go to the desired record page, click the Gear icon, and select "Edit Page."
- Search for "SMS Ninja Chat Console" in Components.
- Drag and place the console component in the desired location on the record page.
- Save, activate, and assign app visibility settings.
4. Sending SMS via Telegram
One-to-One Messaging
Note: For communication on Telegram, first incoming should be received at org, which will give the ID, and that will be used as Record to communicate.
- Go to the record page with SMS Ninja Chat Console.
- Choose the appropriate number and click "Apply" to send a message.
12. Whatsapp Twilio
Steps to Set Up WhatsApp Messaging
- Get a WhatsApp Number through Twilio
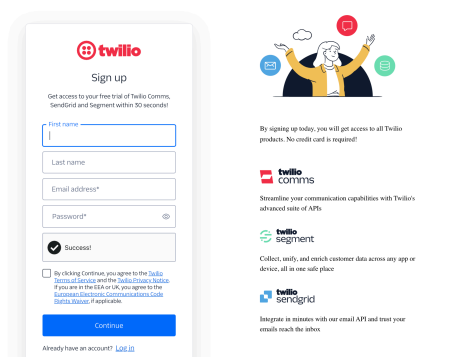
- Visit Twilio for communication services and create an account.
- Verify your email and phone, then save the recovery code.

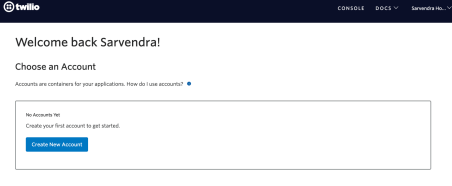
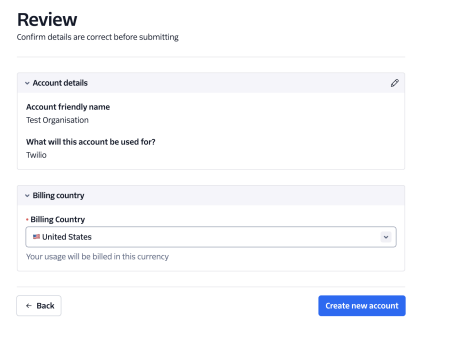
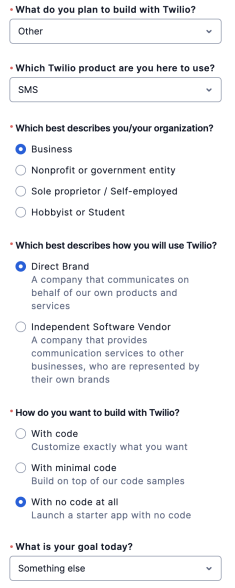
- Complete account details, select your billing country and finalize account creation.
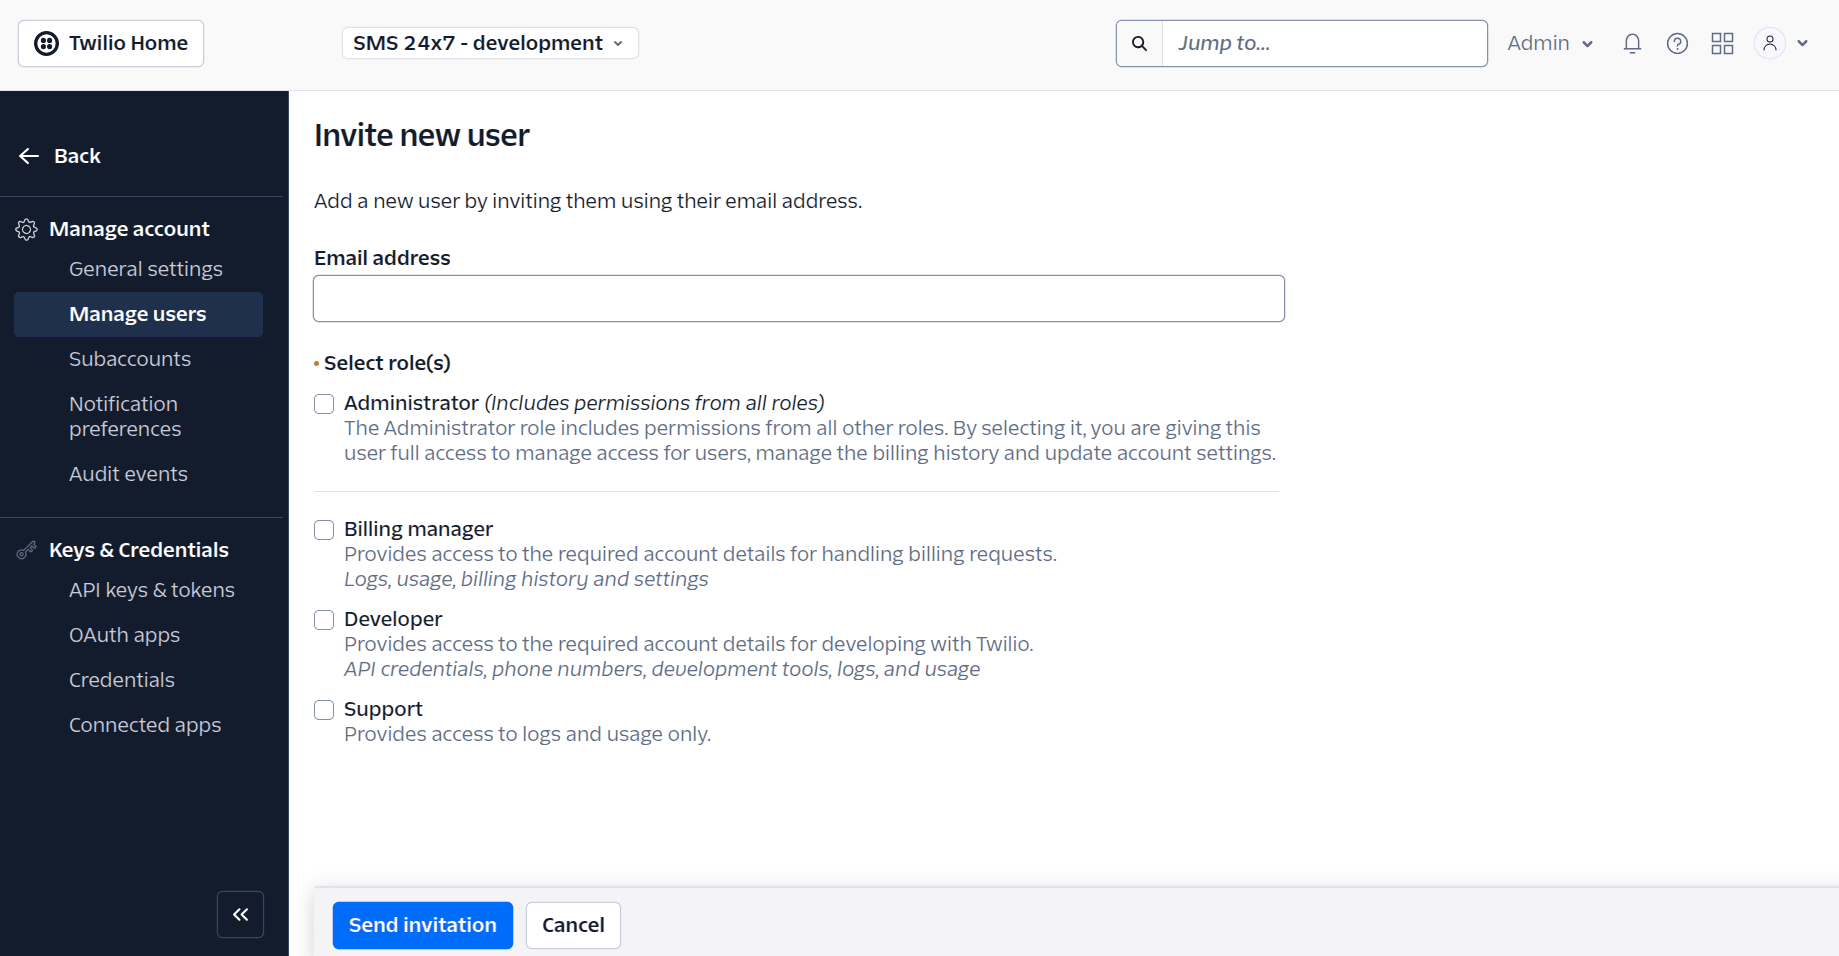
- Click on Invite User in Right side.

- Enter Email “abc.def@gmail.com” and select the role as “Administrator” and Send Invitation.
SMS Provider Configuration:
- Navigate to SMS Settings > SMS Provider Settings, add Twilio as the provider.
- Enter your Twilio Account SID, Auth Token, and a friendly name, then enable it.
Phone Number Configuration:
- In SMS Settings > Phone Numbers, add a company phone number with WhatsApp support.
- Assign numbers to users and designate default owners for incoming messages.
Phone Number Assignment:
- In SMS Settings > User Phone Number Mapping, add a phone number with user.
- Set default owners and enable forwarding to users' phones or emails.
- General Settings: Enable the “Allow WhatsApp” option in SMS Settings to activate WhatsApp messaging.
13. Email
In-App Email Setup
- Admin Setup: Assign User Licenses
- After installing SMS Ninja, navigate to Setup > Installed Apps.
- Find SMS Ninja, click Licenses, and assign users.
Assign Permission Sets
For Users that are above in hierarchy responsible for setting messaging providers, creating campaigns, templates or admins you need to assign the SN_Admin permission set.
- To assign permission set, In Setup > Users > Select the respective user to assign permission set.
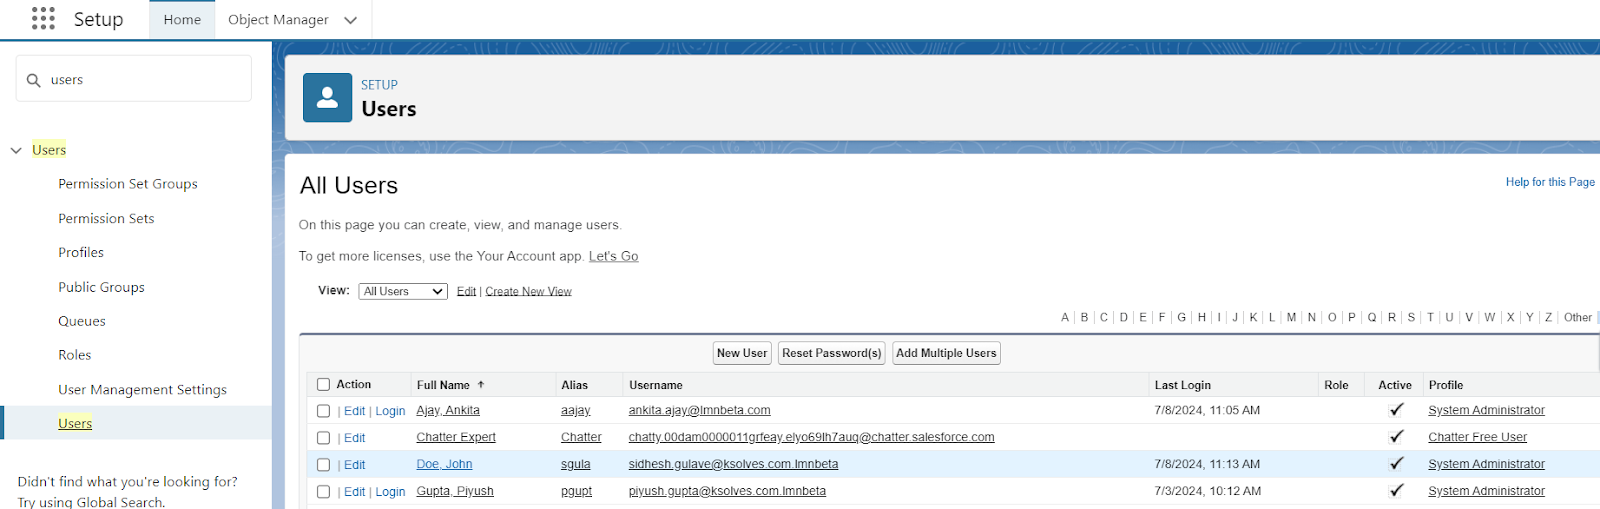
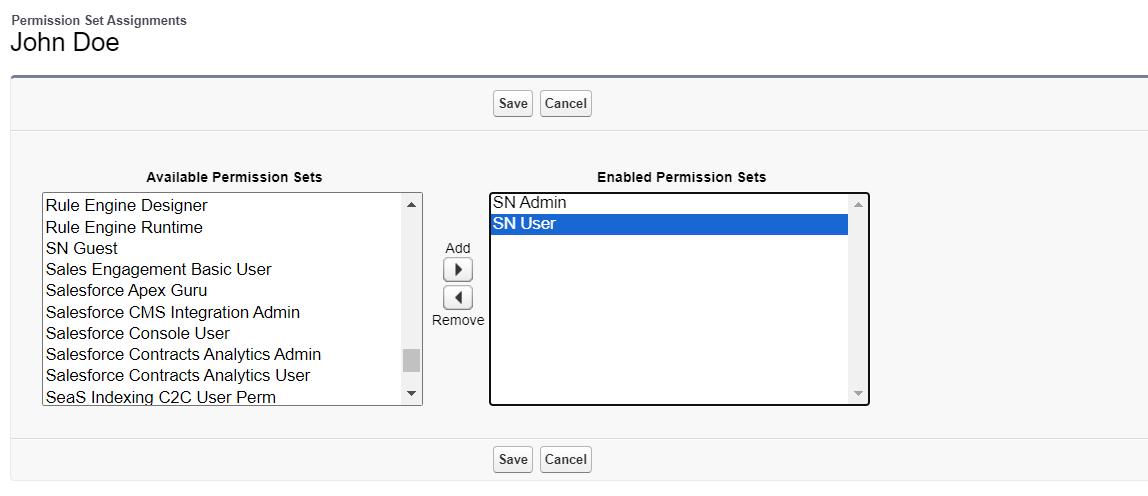
- In the next window hover to the Permission Set Assignment section and click the Edit Assignments button.

- Select the permission set (SN_User or SN_Admin) to add, click Add finally click Save
Email Service Setup
Email services are automated processes that use Apex classes to process the contents, headers, and attachments of inbound email.
- Login onto your salesforce org → click on gear icon → Setup.
- Go to Quick Find on the left side and search ‘Email Services’.
- Click on New Email Service.
- Name the email service.
- Select the Apex Class as ‘SNEmailHandler’.
- If you receive the attachment then please make sure the ‘Accept Attachments’ field will be ‘All’.
- Click on Active.
- Click on the Save and New Email Address.
- Enter the Email Address Name.
- Enter Email Address(Simple Text Without Space).
- Activate it.
- Select Context User (Admin User).
- Accept Email From (Must Empty).
- Save.
- Verify your mail to the ‘Organization-wide Email Addresses’.
Org-wide email addresses in Salesforce are email addresses that will be used by the Salesforce org to send emails from within Salesforce.
- Again go to Setup → Quick Find → Search Organization-wide Email Addresses
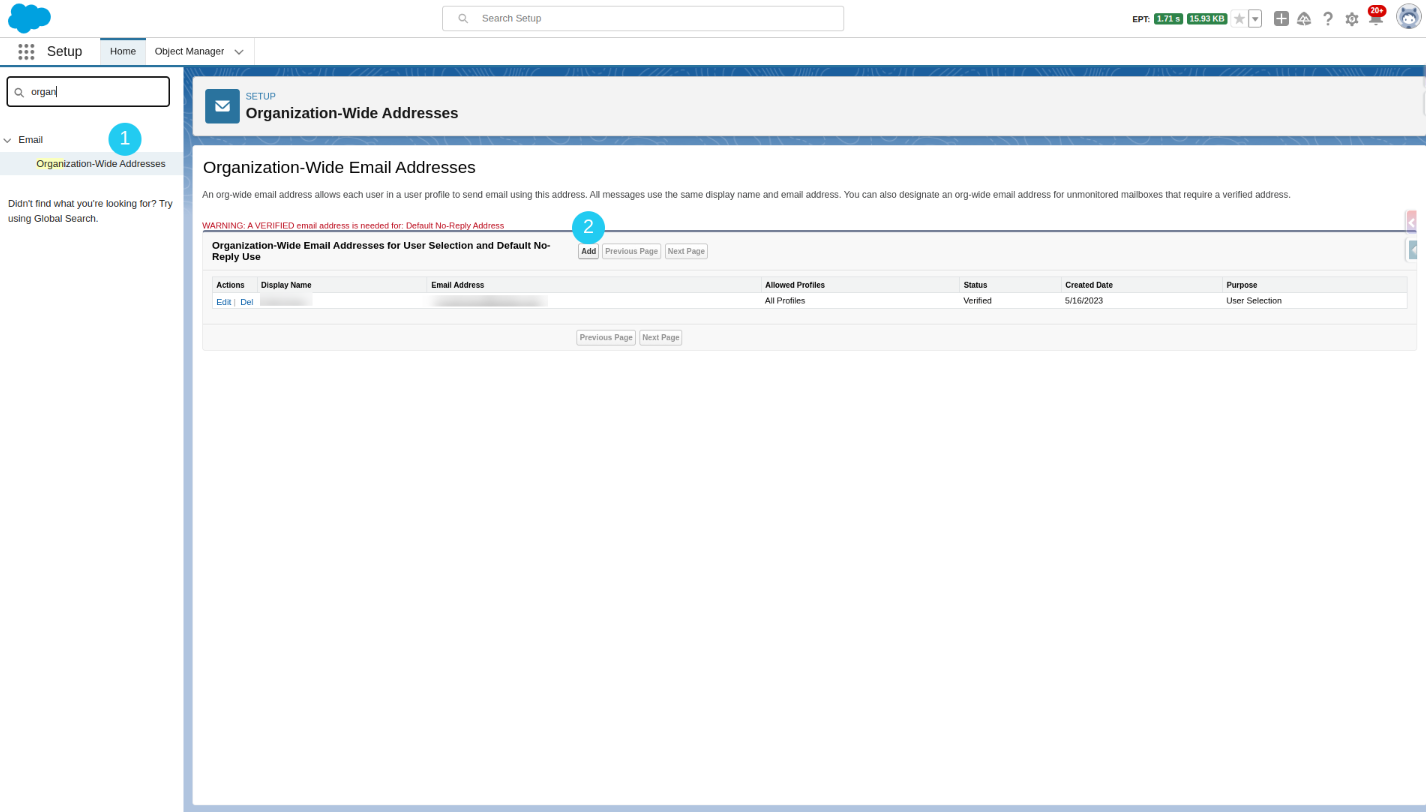
- Click on Add and Fill the Display Name → Fill Email Address → Fill Purpose like below.
- Select the Profiles as the requirement.
- Save.
- Verify it in your mail.
- In the Quick Find search on the left enter Custom Label.
- Click Custom Label.
- In the Quick Find search on the left enter Custom Label.
- Go to Reply_To_Email_SMS (“Edit”).
- Click on the New Local Translations / Overrides button
- Select the Language “English” and Enter the Email service in the Translation Text box.
- Click on Save.
Creating Email Templates
Classic Templates
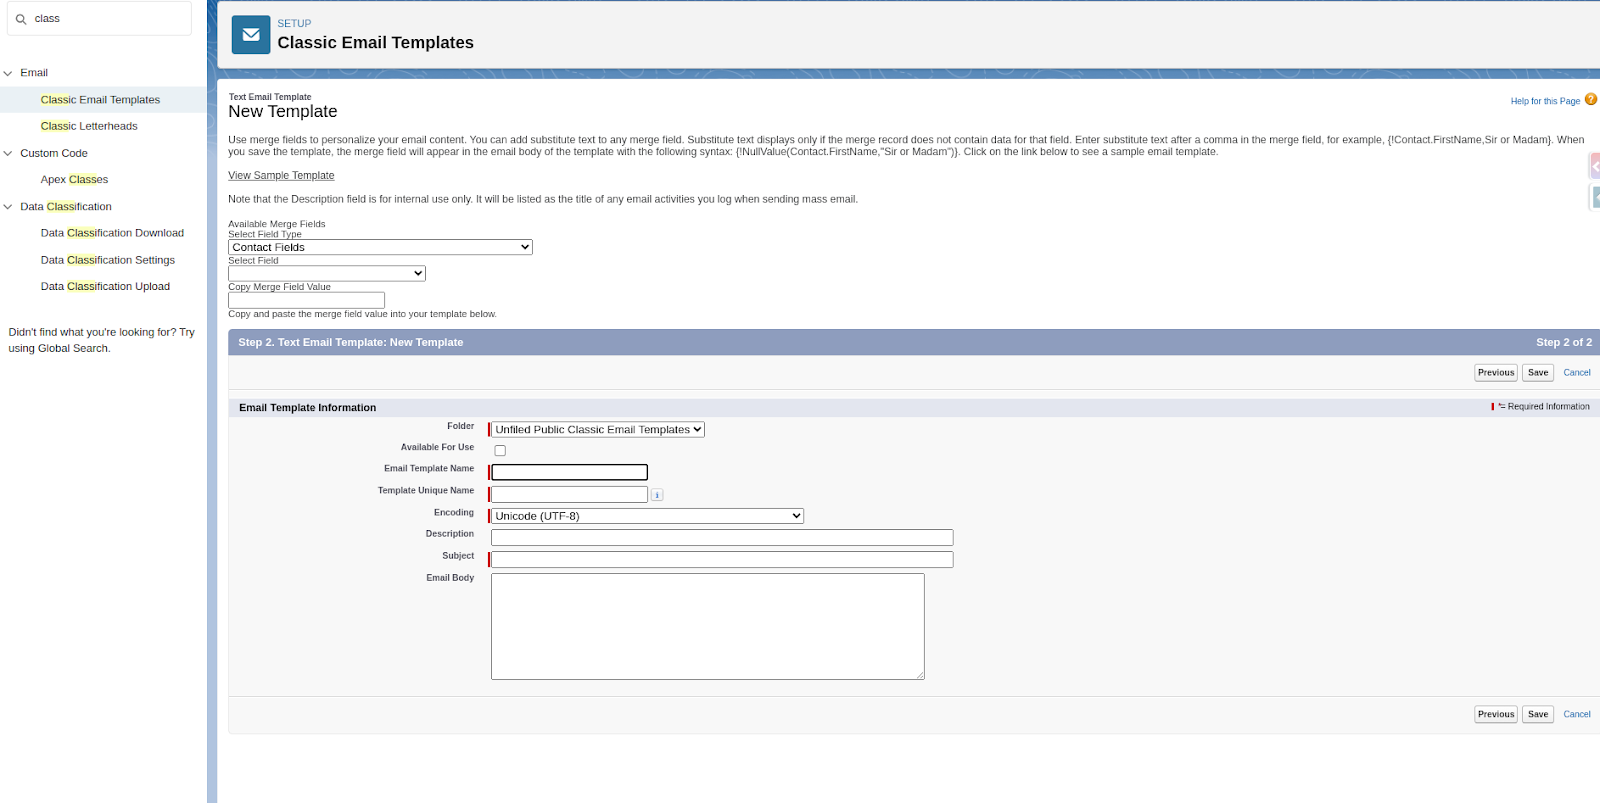
- Go to ⚙️ icon → Setup → Quick Find → Classic Email Templates.
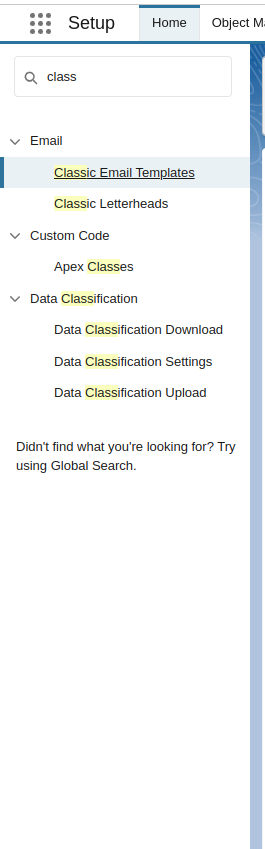
- Click New Template, choose the type, and create the template.
Lightning Templates
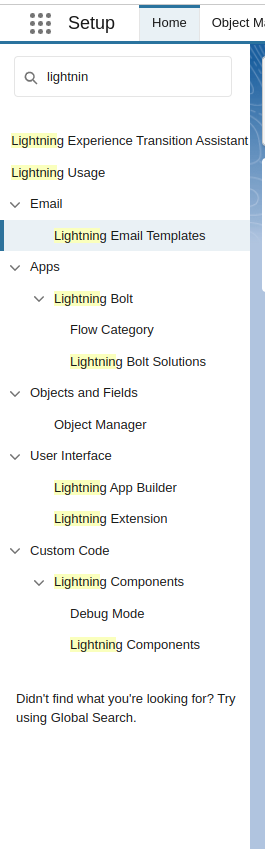
- Go to ⚙️ icon → Setup → Quick Find → Lightning Email Templates.
- Enable Folders and Enhanced Sharing, then go to App Launcher → Email Templates.
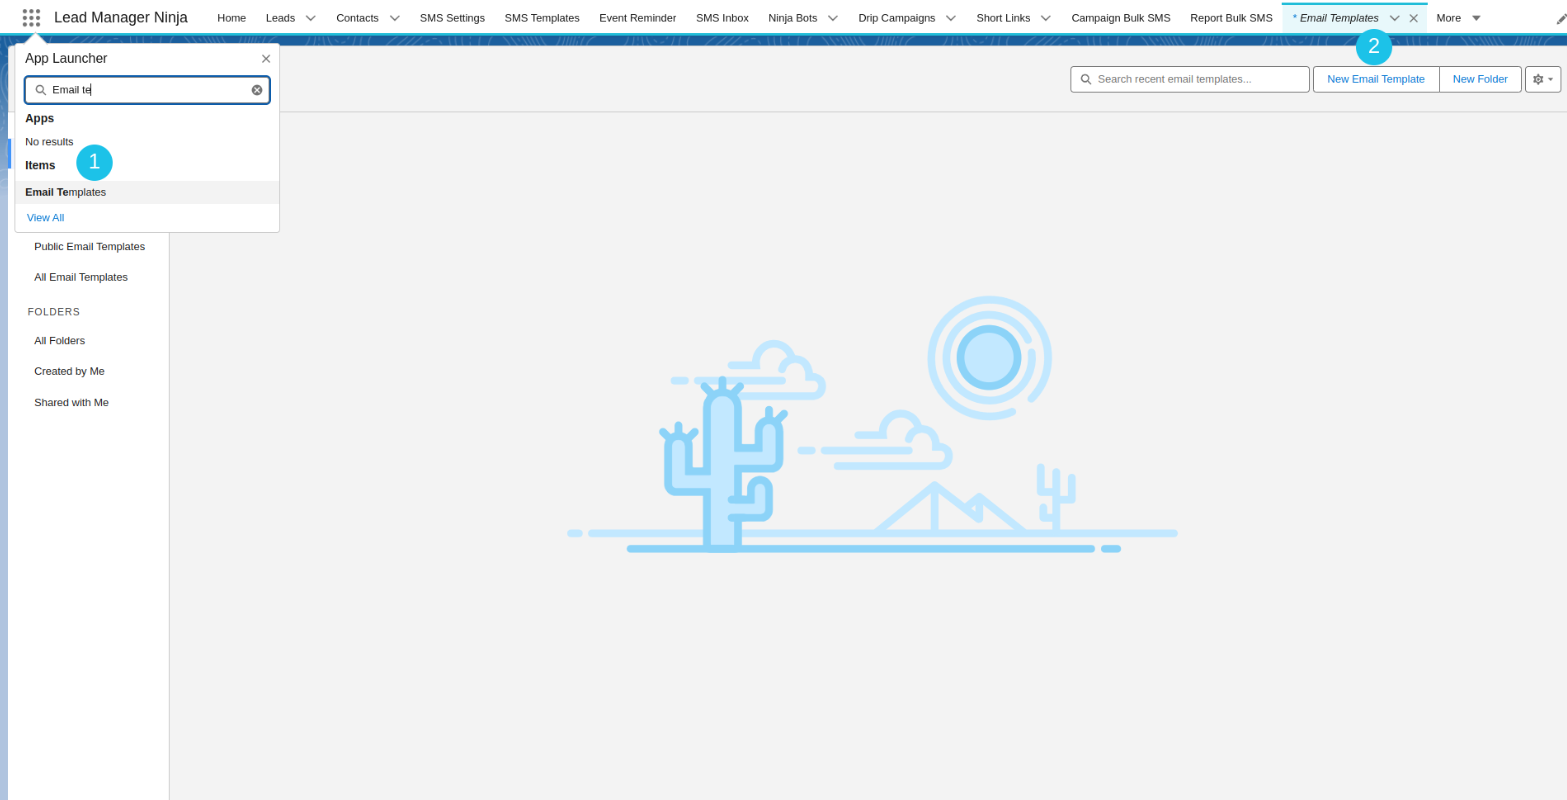
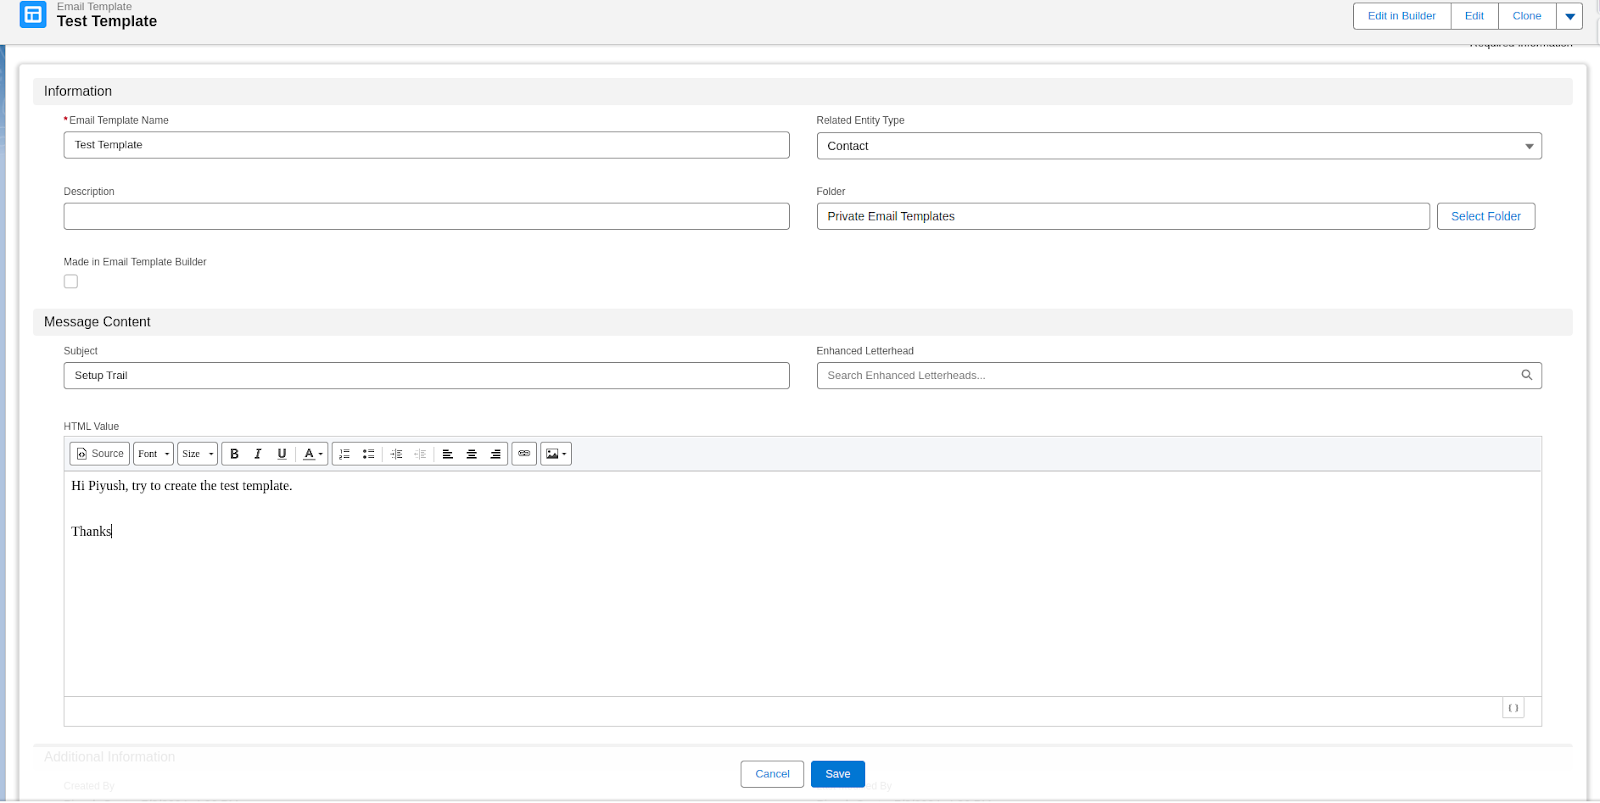
- Click New Email Template, fill in the details, and add HTML content if desired. Save the template.
14. How to use the SMS Ninja’s chat console for sending messages?
- Go to App Launcher → SMS Ninja → SMS Settings → General Settings.
- Toggle on the Salesforce email.

- Send messaging Using Chat Console by clicking on the + icon on SMS pallet
- On the record page, open the SMS Ninja Chat Console, write the content, and click Send.